Wednesday, March 21, 2012

ASOS Braided Friendship Bracelets


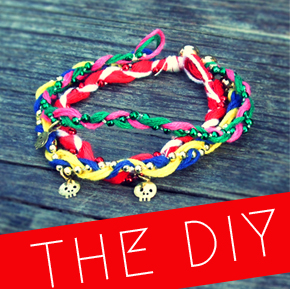
The next tutorial is pretty cool. I love the mix of shiny with matte thread, and these ASOS Retro Skull Friendship Bracelets would be super-cool to make for your friends and yourself! Plus, you can add charms to these (yes, I used a skull, but you don't have to) to customize these. These come together really quick because they are braids, so they are a lot quicker to make than some other friendship bracelets!


Use all different colors to create a rainbow effect! 
Let's get started.


Step 1: Gather materials. Needed are embroidery floss, scissors, a small gold charm (pirate-type skull charms here, cute skulls with bows here, dainty bronze stars hereor dainty silver stars here), a bead and crimp for closure, plastic bead trim (this was leftover from a Christmas project but you can buy this at a craft store) and tape.


Step 2: Start the braid. I used a couple strands of embroidery floss per each color for a thicker braid, and folded the long strands in half so I could make a loop closure at the end. I cut the strands about 4 times what I needed for the length of the bracelet, and this ended up being plenty of string (when you fold them they will be 2X the size of your bracelet). Take your bead trim, place it in between the loop you make with your folded floss. Take a piece of cotton thread or beading floss, and tie all the strands together, making the knot nice and tight right after that first bead in the trim.


Step 3: Glue this knot to hold your start together. Tape your loop at the top of your workspace, and braid your strands together.


Step 4: At the end, repeat what we did at the top (tying with thread, gluing knot) then snip the trim right after the bead which is tied. Thread your crimp onto one floss piece, thread on the bead, then thread back through crimp. Crimp shut. Cut excess, and cut the excess floss that you didn't use. Glue this knot to hold.


Step 5: Add your charm to the middle of the bracelet. 
Finished!

Make them in different colors for your friends!


If you share/use/post this tutorial, please link back to me. It is much appreciated!


Sunday, March 18, 2012

Simple Square Knot Bracelet


The first installment in my friendship bracelet-inspired tutorial section. This tutorial is a great, easy way to ease into the craft! These are addicting to make; they finish up quick, and you can mix and match colors to your heart's content. This tutorial will also tell you two ways of finishing these bracelets; one with a magnetic clasp, the other with a simple bead and loop closure. 


Wear a stack of these bright beauties! Quick and easy to make! Plus, minimal "ingredients" required. 

Let's get started.


Step 1: Gather materials. Needed are seed beads (size 8 or larger), Cotton Embroidery Floss, tape and scissors. Also, either a magnetic clasp or a large bead (mine was about 6mm) and two crimps are needed for closure.


Step 2: String on your beads. Cut a piece of floss about 1.5 times the length that you will need your bracelet to be. String on enough beads to go around your wrist (I used 20, but I have small wrists). Tie a knot at the very bottom of the floss, and tape the top down to a flat surface.
Now, cut two pieces of floss that are about 5 times the length of the thread you already cut. Find the center of these threads. Place it behind the center thread. Now you will knot a square knot. To do this, take your left-side string, bring around to the right, over the center string. Take your right-side string, bring this over to the left, over the left-side string, but behind the center string.


Now, take this same string and bring it up through that left-hand loop, over the left-hand string. Pull evenly on both strings to create the first knot (second pic.)
To make the second knot, take the right-hand string this time, bring it over center to the left. Take the left, bring it over the right string, yet behind the center.


Once it's behind center, bring it forward through the right loop and over the right string. Pull evenly to secure knot.
Step 3: Repeat these steps, remembering to always alternate which string you move first; this will create a flat panel, instead of a spiral. If you accidentally move the wrong string, you will start to get a spiral pattern, which won't work here!
Once you've got a couple of knots, push one bead up. Knot over this bead to secure. Knot once more.


Step 4: Keep adding your beads, until you are all used up. Knot a couple more knots at the end, the same amount that you knotted before adding your first bead. Once you're all even, tie an overhand knot right after your last to end and secure. 
Now, you can use your crimps to attach a magnetic clasp; simply string a crimp onto both sides (for the side that ends with three strings, cut the two and string onto one strand; it'll be too thick if you've got three strands, the crimp won't fit). String on your clasp, bring the string back through the crimp, and crimp shut with pliers. Cut the excess string.


If you want a bead and loop closure, string a crimp onto the side with one strand. Bring the string through the bead's loop or hole, bring the strand back through the crimp, and crimp shut. Cut off the excess. On the other side, simply make another overhand knot, leaving enough space from the first one to fit the bead snugly through. Cut off the excess. It should fit nicely, seen in the last pic!

Two made with bead and loop, one with magnetic closure!


Perfect for every BFF!


If you share/use/post this tutorial, please link back to me. It is much appreciated!


Sunday, March 11, 2012

YSL Mondrain Nail Design


Another nail design tutorial! This time, it's YSL-inspired. You know the iconic Mondrian dress? Well, you can create this on your nails; who knew? Anyways, with a couple of simple steps, you can have this super-cool mani done and ready to wear anywhere. It's pretty similar to my last tutorial, so that means once you get the technique down, you're ready to roll. 


Step 1: Gather materials. Needed are scissors, masking tape, a thin paintbrush, and white, black, yellow, red and blue polish. You also want a nice clear topcoat to finish, and as always polish remover and Q-tips for easy cleanup!


Step 2: Paint a coat of white (or two, if your polish is thin). LET DRY COMPLETELY. Next, cut really thin strips of tape; I used three strips per nail. Set these up so they make a nice Mondrian-esque geometric grid on your nails. You can do a different arrangement on each nail for added interest. Once you've got the tape nice and pressed down (so polish doesn't leak underneath), paint one chunk red, one chunk yellow, and one chunk blue. Leave the others white, to mimic Mondrian's iconic art. Like in the last tutorial, rip the tape strips off as soon as you can (start with the tape on top of the rest, then the one underneath, then the last one to prevent smearing). 


Step 3: Take your black paint, and use your paintbrush to paint over where your tape grid was. Make nice even black lines to finish outlining your color chunks. Clean off any polish on your fingers before it dries. 
Repeat for next nail (see, I have a different tape composition on this nail).


Step 4: Repeat step 2 for this nail. Continue taping, painting the chunks, and ripping the tape off. Then, continue with step 3 for all the nails, finishing your grids with black paint. Clean off any polish from your cuticles/fingers with the Q-tips. Let them dry completely. Finish with topcoat!

Very Mondrian!


Sunday, March 4, 2012

London Calling: Nail Design


Ok, here it is. In honor of London Fashion week, I have made an original nail design tutorial that's easy enough for any budding artist. This tutorial doesn't use any materials you don't already have in your house.
 Cool enough for pretty fashion icons, rock 'n rollers, or even plain Janes; the Union Jack pattern is totally eye-catching on your nails! 
Let's get started...


Step 1: Gather materials. Needed are red, blue and white nail polish, clear coat, masking tape and scissors. You will also need a thin paint brush.


Step 2: Paint your nails with the white. You may need two coats to fully cover. LET DRY COMPLETELY. If you don't let 'em dry, your nails will be ruined in the next steps.
Now, take your masking tape and cut two strips; place them in a cross pattern on your nail, right in the center. Then, cut two thinner strips and crisscross them over the thicker cross, mimicking the Union Jack pattern. Refer to picture for placement! Make sure your tape is fully pressed down, all the way to the edges of the nails. This will make for crisper lines.


Step 3: Paint! Paint right over all that tape with your blue, filling all the white space. As soon as you can, carefully rip the tape off. If you wait 'till the paint dries, you will ruin your design. When this blue is dried, take a thin paintbrush, and use it to carefully paint a red cross in that center white cross to finish the Union Jack. If you have any polish on your skin, clean it off with a q-tip as soon as you can; it's easier to clean when still wet. 


Step 4: Continue with each nail. My tape crosses stuck together like a decal, so I could reuse it. You might have to cut new tapes for each nail if yours does not stick as well. 
When you have completed each nail, you might need to re-touch some of the lines if they didn't come out perfect. You can use that paintbrush to touch up lines, just clean it off with nail polish remover in between colors.
Paint with clear gloss once EVERYTHING IS FULLY DRY. 
You are ready to rock!


If you share/use/post this tutorial, please link back to me. It is much appreciated!


Friday, March 2, 2012

Lightning Bolt Necklace


From Diane Kordas

This super-chic necklace from Diane Kordas, found on fashion site Net-A-Porter, is the topic of my latest tutorial. It combines 18k Rose Gold with black diamonds, with a blackened gold setting, with a pretty hefty price tag of  $755. That's ok, don't fret; you can indeed make your own look-alike for pennies, thanks to some clay, glitter, and glue.

My Version
For my version, I chose to add both black and gold glitter to my pendant for a "gold-dusted" look. If you want yours to be totally black, stick with just black glitter. You can even do different color glitters for different colored looks!
Let's get started.


Step 1: Gather materials. Needed are clay, a chain and small jumping or head pin, tissue blades or Xacto knives, lacquer, and fine glitter.


Step 2: Make the bolt. I rolled my clay out to setting 3 on a pasta machine. If you don't have one, roll till about 1/8" thin or so. Then, use your blade to cut a small lightning bolt shape like this out.


Step 3: Add the glitter. Place your cutout in the bottom of a small bowl (to contain the glitter!). Take your black glitter with a paintbrush, and "paint" a small amount on top of the clay. Use your finger to push into the clay to adhere. Don't push too much or you'll disfigure your lightning bolt. I then added a bit of gold sparkle glitter on top, pressed in, for a more gold-dusted look. If you don't even want black or gold, feel free to mix other glitters for a custom look! You could even apply this technique to different cutout shapes!


Step 4: Go bake your bolt for about 15 min. (I bake at about 120 degrees in a toaster oven). When done and cooled, paint your bolt with a bit of lacquer to finish. Then, I superglued a small headpin I looped at the end at the back of the bolt. You could do my hot-glue then superglue technique as well for more security. Add your chain!

Finished! Sparkly and cool.


If you share/use/post this tutorial, please link back to me. It is much appreciated!