Showing posts with label nail art. Show all posts

Friday, October 24, 2014

Easy Creepy Bloody Nail Manicure


Spooky!


My first Halloween tutorial is super simple and super quick. These easy peasy bloody nails are great when you want a holiday vibe but don't want to invest a lot of time. I got my manicure done in less than 10 minutes! 


All you need is some red nail polish, a nail art brush and clear coat.
Start by dripping some red polish (ignore the white here)..picking some up with the brush...


and painting a base by the cuticle on your nail. Then, drag your brush out unevenly to create drips! Make little drips by dotting the polish. Continue for each nail. This is a great tutorial because it's SO QUICK and the unevenness of the paint is great for when you gotta paint with your other hand.


You could always start with a base nude coat if you don't want your plain nail underneath, but it looks creepier my way!


Pair this manicure with some red sparkly accessories to match- because we all know- sparkles make everything better!


Go out and rock the look! Stay tuned for more quick but very Halloween-y tutorials to come!


All photos copyright Allison Beth Cooling. Do NOT post/use without crediting and linking to me! Or I'll put a spell on you! :)


Monday, August 25, 2014

Watercolor Blossoms Manicure


Super regal, super detailed, super cool.


These intricate nails surely make a statement! Thanks to Born Pretty Store and their vast selection of nail art wraps, rhinestones, paints, foils, decorations and more, I was able to create a totally unique manicure that is perfect for parties or events. I would say this manicure takes more time than most, but it's definitely worth it.

Let's get started.


Step 1: Gather materials. Needed are white nail polish, crystal nail gems, Born Pretty Blue Flower nail decals, Born Pretty Silver Decals and Born Pretty Rhinestone 3D Decoration. I also used clear varnish for a top coat- China Glaze Nail Polish, White On White, 0.5 Ounce.


Start by painting all your nails white. On the index, ring and pinkie finger, apply the full-nail blue flower water decals. For info on how to apply water decals, see my previous Royal Teal Nail Tutorial.


Apply the silver decal over the ring finger's blue flower decal. Add a clear crystal with nail glue, and cover with clear varnish to finish. Coat the index and pinkie with clear varnish as well. Add two silver decals to the thumb, and then add a crystal to finish. Coat with clear varnish.


On the middle finger, add nail glue and apply the large 3D decoration.


Lovin' it, right??! Born Pretty is the go-to one-stop-shop for all of your nail art and beauty needs. I love their full-nail water decal wraps, which save you time hand painting and always look perfect. They are also easy to apply. I just put the whole decal on, then waited for it to dry. Cut the excess off with a cuticle cutter or small scissors to fit your nail. These blue flowers here remind me of watercolor paintings. When contrasted with the ornate 3D decoration and rhinestones, you have a winning combination. These 3D decorations really only work if you have long nails. They will not fit on smaller, shorter nails. Also, they need a lot of nail glue to stay on. They are quite heavy, so be careful and don't expect them to stay on past a day. That's why these nails are more "event-ready" instead of everyday!


Style these with a black oversized sweater, skinny denim, a long crystal necklace and sweet shades. Rockin' it!!


I have a coupon code here for all those who want to shop Born Pretty. Use this code HXSQ10 to get 10% off your order. Born Pretty also always offers free shipping, what could be better than that???! Shop away girls!


All photos copyright Allison Beth Cooling. DO NOT post/use images without linking back and crediting me.

Monday, July 28, 2014

Birds of a Feather Manicure


Purples and golds and sparkles.


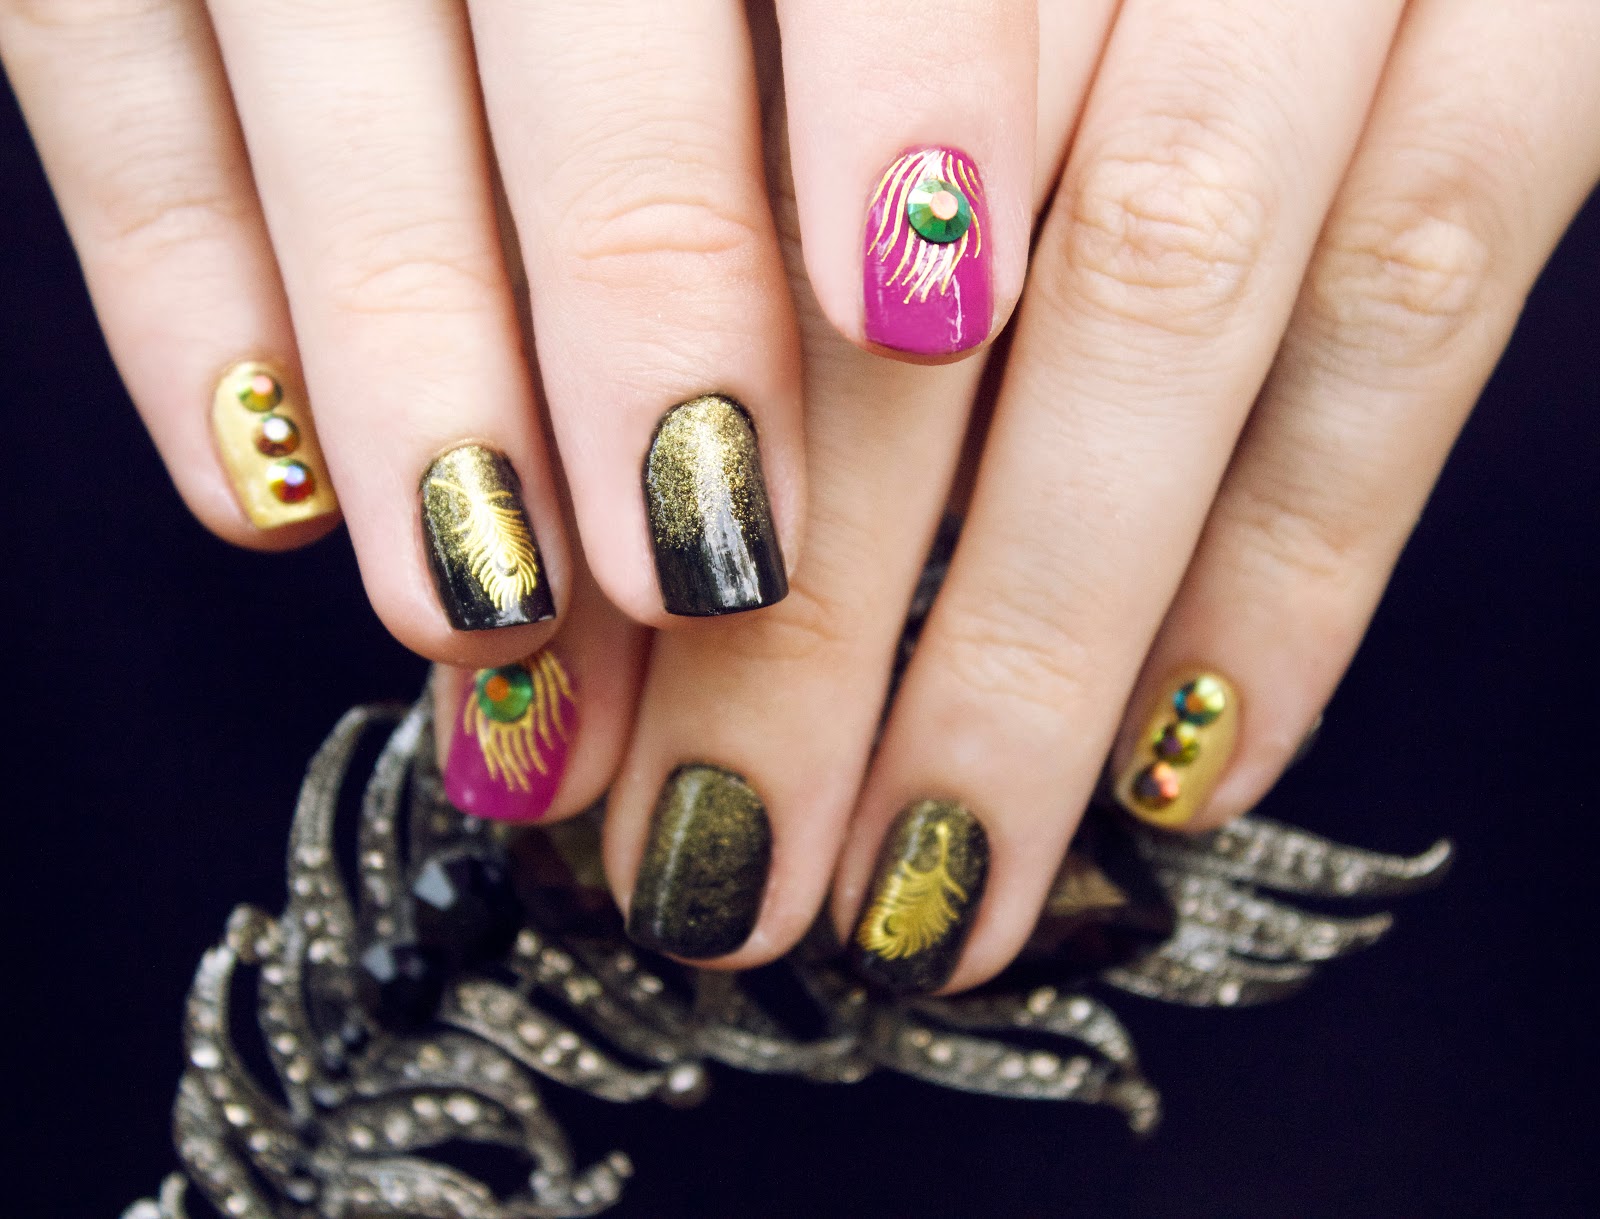
This nail tutorial is all about elegance; these gold feather decals just add that fine detailed look. Unexpected vitrail-finished crystal flat backs also add a modern vibe. I think I am obsessed with the vitrail look; that multicolored metallic-looking finish that's becoming more popular these days. It's an edgier version of a traditional crystal.


This manicure was made possible with supplies from nail art and beauty superstore Born Pretty. This store has everything and anything you need to update your entire look! From gems, decals and polishes to jewelry, clothing and more, be sure to check them out online.

If you are interested, I've got an exclusive coupon for y'all.
Use the code HXSQ10 on Born Pretty Store to get 10% off your order! With free shipping, you can't beat their selection. The prices are great as well. Most nail art supplies are around $2, which is my kind of price! You can get lost shopping on their site….seriously.
Let's get to the tutorial.


Step 1: Gather materials. I am using Born Pretty Peacock Gold Feather Decals Item Id 13673 and Born Pretty Rhinestone Wheel Id 14724. I also used gold shimmer polish, nail glue, black nail polish, purple nail polish and clear coat. I painted all my nails black except for the index and pinkie (yes, it shows black here, but paint the pinkie gold. I changed my mind!). Paint the pinkie gold and the index purple. 


On your black nails, use Born Pretty Sponges to get a gold gradient. Simply paint the edge of the sponge with a bit of gold and dab at the bottom of your nails to get a gold dusted look. On your index finger, take the large feather decal and apply. These are water decals; for more info on how to use these, view my Royal Teal manicure.
On the ring finger, apply the smaller feather decal.


On the Pinkie, simply use nail glue to apply three Born Pretty gems in a line down your nail. Press down and let dry. I also added one bigger gem to the index finger, placing it on the middle of the feather decal. When everything is dry, simply finish with top coat.


Purple and gold is a classic combination, standing for royalty. The addition of black is my touch, as you all know its my favorite color. If you don't like that gothic touch, you could do a darker purple with gold, omitting the black.


This works great with all nail sizes. As you can see, mine are way shorter than they have been. Sadly my long nails have broke, forcing me to start from scratch. I always think darker colors look better on short nails, hence the palette. You could switch up the colors to fit your style! The peacock feather decals also come in silver, and Born Pretty's rhinestones come in all colors. A baby blue/silver /white combination would be really pretty, or go girly with neutral polish, gold decals and Born Pretty Pearls.
The possibilities are endless!


Sophisticated yet stylish!


I find that these water decals are so easy to use, especially because they can be repositioned while still wet to get the perfect fit. If you were using a sticker, you'd be stuck with where it was placed first. I would recommend water decals to anyone!


All photos copyright Allison Beth Cooling. DO NOT use/post without linking to me and crediting me!

Tuesday, July 1, 2014

Blues Bouquet Nails


The moody blues are feelin' floral.


I've got here a vintage-inspired manicure using Born Pretty's rose nail decals, plus extra glitter and polka dots.


The bottom base blue is IBD Just Gel Blue Haven.  


After being somewhat skeptical to gel polishes, now they are the ONLY kind I wear. My nails do not break, even through me making jewelry and other crafty items.


The rose decal here adds the right amount of vintage touch. This same decal sheet also comes in a red/orange and purple scheme. And it's only $2.39 for the whole sheet….


Nothing is complete without glitter. The glitter here is from Claire's.


And of course my obsession with the double-sided manicure. I went simpler this time with a purple-pink color underneath, to match with the purple rose decals. Last time, I did a pop of neon yellow but this manicure called for something more subtle.


A vintage purse completes the look!


All photos copyright Allison Beth Cooling. DO NOT use/post images without linking back and crediting me.

Wednesday, May 28, 2014

Ice Galaxy Foiled Nails


Just a few shots of my metal-flecked nail design!


I used Born Pretty Store silver metal nail foil. I first did a white gel manicure using Sally Hansen UV set gel polish White Away. Then, I put a thin top clear coat and pressed the foil sheets down in multiple spots on my nails. after you lift up the foil, some sticks to the nail, creating that "flecked" design.


You can find this type of foil and all other colors here.
I specifically used this foil for my manicure here!

Get connected with Born Pretty!


Tuesday, May 20, 2014

Lady Lace- Easy Pedicure


This time, I'm using water decals from BornPrettyStore.com on my toes for a simple and easy pedicure.
Born Pretty has a TON of different beauty products, jewelry, clothing pieces and other great accessories. What I love most is their extensive collection of nail art products!
Their prices are great- you can get nail decal sheets for less than a dollar. That means a lot of bang for your buck!
Using water decals for your toes is so much easier than using stickers. If you are doing your own pedicure, you don't have to place the decal in the exact spot you need at first, the water decal can slide a bit to fit where you need it!


I am using a lace decal here along with a pink and shimmer polish for a vintage-inspired look.
If you love nail art and beauty products, Born Pretty is right up your alley.
Get connected with them!


Step 1: Paint your nails a base coat. Then, paint a sheer shimmer on top of every nail but the big toe!
I used OPI Pink Flamenco base and then a Sinful Colors Purple Diamond for the shimmer.


Step 2: Place the biggest lace decal right on the corner of your big toe. For info on how to use water decals, view my Royal Teal manicure post.
Make sure your nail is wet, along with your fingers, so that the decal can be moved into place! Let everything dry, then finish with top coat!