Showing posts with label thread. Show all posts

Monday, November 16, 2015

alina necklace

Alina necklace diy by Allison Beth Cooling

My bohemian-chic Alina necklace combines thread, crystals painted beads in an entirely new way! I was inspired to make this design based on intricate glass folk beads by Cousin - the combination of black and slightly metallic rose gold caught my eye.

Alina necklace diy by Allison Beth Cooling

These beads totally reminded me of those painted eggs you see in Ukranian, Polish and Romanian culture. I have a wonderful friend in Romania whom I reached out to, for her insight into Romanian fashion and culture. Don't pass up the opportunity to learn and share knowledge! I asked her to give us a little information about fashion and style, including traditional wear, from Romania where she resides. She put together this fabulous excerpt that we can all learn from:

"Like everywhere, Romanians are interested in the global influences on fashion​,​ especially where women's clothing is concerned​ and ​a mixture of tastes can be found.​​ ​So skinnies and skyscraper heels are just as common here as anywhere else. O​ut of the cities, traditional costume is worn in many of the festivals around the country though​,​ which is a delightful and very colourful reminder of the country's cultural ​and rural ​heritage. ​Art and​ textile production uses, amongst other things, motifs such as flowers and the small geometric patterns seen in needlepoint. The traditional costume consisting of blouses ('ie' in Romanian), calf length skirts and decorative aprons, is a good example of the display of these motifs.​ It is great to see that the fashion industry is determined not to forget these influences - this is a nice link on the Free Dictionary showing how designers are incorporating the traditional onto the catwalk.  ​Anyone who has seen a picture of some Romanian painted eggs might also recognise these patterns.​ Man's artistic tendencies are strongly linked to nature and Romania is surely a country which, through it's traditions, demonstrates this in very practical ways. Your soul is touched, simply but directly, by seeing the artistic expression in daily life."

Caroline​ Heywood​ @hongkongsnoopy (Instagram)

Thanks Caroline for the writeup and finding the images below!


Alina necklace diy by Allison Beth Cooling

Keeping what Caroline said in mind, I wanted this design to reflect some of that culture, so I chose to use thread and just add a little bit of my signature sparkle with copper bicones. The result is a timeless piece that will surely catch attention! Let's start.

Alina necklace diy by Allison Beth Cooling Step 1: Gather materials. Needed are scissors, embroidery floss, folk painted beads (mine from Cousin), and round plastic links ( I found these near the embroidery  / yarn section in my craft store). If you don't have the links, you can use any large metal / wood link (from the beading section). You will need clear monofilament, a class / jumpring, crimps, and flat nose pliers. I also used 6mm metal filigree beads and 4mm copper bicone crystals, also from Cousin.

Cut a 2 foot piece of embroidery floss. Tie an overhand knot on the link, and then start wrapping tightly around the link. Keep it snug!


Step 2: Finish wrapping the link. With the excess string, thread on a metal bead, then the folk bead. Tie off at the end. Repeat twice more (I used brown thread on the second link).

Lay out the bead pattern you want - I alternated metal beads and painted folk beads.


Cut a 1.5' piece of monofilament, and thread through a red link. String on beads to the grouped sides, until the the necklace is half as long as you want it. Add a clasp, crimp, and crimp shut. Repeat to the other side.


To connect the middle links, cut a 6" piece of monofilament, string on a crimp, and then string on enough bicones to enclose both links, plus a little more for wiggle room. You don't want these too tight!  Crimp shut and cut the extra. Repeat to catch the other two links.


Alina necklace diy by Allison Beth Cooling

Feel free to switch out colors based on your beads. Add wrapped links for a fuller necklace, or just use one link to keep it simple.

Alina necklace diy by Allison Beth Cooling Alina necklace diy by Allison Beth Cooling

COPYRIGHT
Because I take all photos for my blog, the images within this post are all copyright Allison Beth Cooling for Quiet Lion Creations. If you'd like permission to use a photo, email me at allison@quietlioncreations.com

Thursday, August 9, 2012

Vanities-Tiny Skull Bracelet


This Vanities Skull Bracelet is a super-easy DIY that doesn't even take 10 minutes! 
Use up your cool colors of embroidery floss to make different looks. Not into skulls? 
Use different character beads for different themes! I found these skull beads at a local beadstore.


This DIY makes a bracelet that ties once around your wrist. The Vanities bracelet is a bit longer and wraps a couple of times. If you want yours longer, use longer lengths of thread.


Bright and fun! Use as many or as little colors as you want. My tutorial uses 3, but you can alter that amount.


Step 1: Gather materials. Needed are scissors, embroidery floss, and a skull bead. You will also need tape.


Step 2: Cut about 4 times the length you want your final bracelet to be; fold this piece in half. Repeat with 2 other colors. Tie overhand knots about 1" from the end. Tape these three flosses together on your table. Take the leftmost color; twist this thread towards the left, really tight (but not too tight that it bunches up). Repeat with the center color, and the right color. You may need to either hold the ends in your teeth or tape down to keep the twist tight while twisting the other threads!


Step 3: Now, take all of the threads together, and twist them to the right; a spiral should form and hold tight. You can stop twisting when the bracelet holds itself in the pattern.


Step 4: Add your skull bead to the middle and knot. Knot the ends as well and cut.
Tie these on like friendship bracelets!


Thursday, April 19, 2012

Chan Luu Single Wrap Macrame Bracelet


Chan Luu bracelets are just so cool! What's great about them is that they use simple macrame techniques to produce different results, this time with the addition of beads! This tutorial adds on to my previous Square Knot Friendship Bracelets, but utilizes the beads in a different way; on the outside of the knots as opposed to the inside. What you get is a totally different result!


These would be awesome friendship bracelets!


Step 1: Gather materials. Needed are 3mm glass gemstone beads, cotton thread for knotting, scissors, tape, and a bead and crimp for closure.


Step 2: Start the knots.  Cut one length of your cotton thread about one and a half times the length of your wrist. Tape at the top to your table. Cut one length of cotton cord that is about four times the length of the thread you just cut; this will be your knotting thread. Start to knot, just like how we started in my Square Knot Bracelet Tutorial.
Once you have a couple of square knots, take either side of the thread and add beads to these threads. The number of beads will depend on how one you want this bracelet. Once you've added all your beads (make sure there's an even amount on each side), tie knots at the end of these threads to hold the beads on.
Now, you will do a square knot with the beads on the outside (instead of the inside like in the Square Knot Bracelet Tutorial). 
Take two beads right up to the last knot. 
Make a square knot, making sure the beads are caught in the knot and lie right on either side of the center thread. Tie one more square knot to hold the beads in place tightly.


Step 2: Continue this method.
Once you have gotten one square knot set, continue to knot in this way, until your bracelet is as long as you need. To finish, add the bead and crimp to one end, crimp to close. Make a loop with the other end (big enough so the bead fits snugly), and crimp close. This is also explained in the Square Knot Bracelet Tutorial.
You're finished! See how easy that was?

One with bead closure, one with clasp. You choose!


If you share/use/post this tutorial, please link back to me. It is much appreciated!


Wednesday, March 21, 2012

ASOS Braided Friendship Bracelets


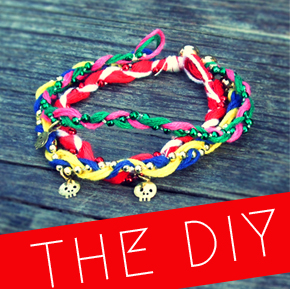
The next tutorial is pretty cool. I love the mix of shiny with matte thread, and these ASOS Retro Skull Friendship Bracelets would be super-cool to make for your friends and yourself! Plus, you can add charms to these (yes, I used a skull, but you don't have to) to customize these. These come together really quick because they are braids, so they are a lot quicker to make than some other friendship bracelets!


Use all different colors to create a rainbow effect! 
Let's get started.


Step 1: Gather materials. Needed are embroidery floss, scissors, a small gold charm (pirate-type skull charms here, cute skulls with bows here, dainty bronze stars hereor dainty silver stars here), a bead and crimp for closure, plastic bead trim (this was leftover from a Christmas project but you can buy this at a craft store) and tape.


Step 2: Start the braid. I used a couple strands of embroidery floss per each color for a thicker braid, and folded the long strands in half so I could make a loop closure at the end. I cut the strands about 4 times what I needed for the length of the bracelet, and this ended up being plenty of string (when you fold them they will be 2X the size of your bracelet). Take your bead trim, place it in between the loop you make with your folded floss. Take a piece of cotton thread or beading floss, and tie all the strands together, making the knot nice and tight right after that first bead in the trim.


Step 3: Glue this knot to hold your start together. Tape your loop at the top of your workspace, and braid your strands together.


Step 4: At the end, repeat what we did at the top (tying with thread, gluing knot) then snip the trim right after the bead which is tied. Thread your crimp onto one floss piece, thread on the bead, then thread back through crimp. Crimp shut. Cut excess, and cut the excess floss that you didn't use. Glue this knot to hold.


Step 5: Add your charm to the middle of the bracelet. 
Finished!

Make them in different colors for your friends!


If you share/use/post this tutorial, please link back to me. It is much appreciated!