Tuesday, August 27, 2013

Guest Feature: Kelly Galanos from Sycamore Hill


Look what I've received in the mail! Or should I say, what my 11 year-old dog Bubba has!
Super-cool Kelly Galanos from Sycamore Hill makes the most unique hand-stamped metal spoons, silverware, and other goodies. 

Kelly's Etsy store, Sycamore Hill, specializes in selling her awesomely upcycled goods to the masses. A little more about Kelly is below (taken from her Etsy site!)

"A native of Chicagoland, I have lived among the scenic rolling hills of Bluegrass “horse country” for the past ten years. Louisville's charm has grown on me ~ and as an lifelong equestrian, it has been especially sweet for me to be surrounded by everything equine.

Our property sits atop a steep crest and is affectionately named Sycamore Hill. My studio overlooks the century-old tree, after which the property is named. I have quite an incredible view! My time away from the Hill is largely spent with my horse, Monty, at his stables just outside of historic downtown LaGrange, Kentucky."


What I received was from her Pet Tags collection. A perfectly personalized set of dog tags for my Bubba! The BOHO tag for his name piece. So much chicer (and meaningful!) than just any tag you buy at a pet store! What's great about Kelly's store is that you can completely personalize the tag; shape, font, font size, and even color of the metal. 


Then, of course, a "Call My People" tag to complete the identification set. I just love the handmade quality of these, that they are made by a caring individual, not a machine! All my readers know how I emphasize the DIY lifestyle, and Kelly definitely embodies this lifestyle!


In addition to her pet tags, she's got hand-stamped silverware (which still function as silverware!) , good-luck horseshoes, and key fobs and tags. These are super-cute gifts and can also be personalized to convey a message. Birthday parties, wedding gifts, congratulations gifts,....the list goes on and on. Truly special! 


Needless to say, Bubba loves his tags. Looking dapper!

Follow Kelly on Twitter, and like her on Facebook for updates!


All photos copyright Allison Beth Cooling.

Friday, August 23, 2013

Official Cousin Corp. August Assignment: Florida-Inspired Hand and Body Chain


Alternative jewelry is grabbing the world by storm; and I am totally joining the bandwagon. As a jewelry designer, I love innovations in how to wear and design jewelry. These hand chains and body chains are a merge of distinct jewelry styles: the hand chain, a bracelet/ring hybrid, and the body chain, a sort of necklace/belt/harness mix! Just like with the Midi Ring craze, I am so stoked, and needed to make a tutorial.
And, as I am an official Ambassador for Cousin Corporation, this entire project (hand + body chain), is made exclusively from Cousin products! Just shows you that you don't have to shell out a ton of cash to make these pieces, and you can make them from materials you can get at any major craft store (i.e. Michaels, JoAnn, Hobby Lobby...)


I will show you my sketches for this project. I usually don't do sketches, because I like to create things as I go. But, I had a strong idea for this project and thought I'd make it more "official"!


I did stray a little from these sketches, by adding a few small tweaks. But, I thought I did pretty good sticking to my original idea here!


These are all views of my "Moodboard"; I usually always create a "Moodboard" when I start any sort of more involved project. I do this for my graphic design as well; I would recommend any other artist to do so: collect images you love from magazines, different pieces you have collected from your travels (here I included a seagull feather and shells I found while in Miami and Florida), and any other unique pieces or ephemera you need to create a certain "mood", or inspiration. This will help guide your project and can offer color palettes, imagery, or even in designers' cases typography, pattern and shape. I included images from photoshoots and advertisements from both fashion magazines and interior design magazines; don't limit yourself. You may find some imagery useful in any kind of magazine! You can see my final projects on the left. I wanted to capture the colors of the Floridian beaches (greens, blues, and silvers of the water and sky) and merge them with the cool, hip vibe of Miami.


Are we finally ready??? Let's get started!


Step 1: Gather materials. There is a longer list than I usually have! Ready?
*Beading wire (Cousin Cord Basics in White)
*An assortment of beads:
-Crystals (I used Crystazzi Crystal 6mm Erinite Bicones and 4mm Confetti Mix)
-Lampworked beads (Cousin Glass Swirl Beads). I used a mix of those two strands of beads and that card with the swirled beads on them.
-Plastic Faux Stone beads (Cousin Blue Crackle). These are those big blue beads you see.
-Plastic metal beads (From the Cousin Class in a Box kit). These are 6mm.
*Chain:
-White 3mm chain (Cousin White Chain)
-Silver 4mm Chain (From Cousin Class in a Box Kit)
-Green 5mm Chain (Cousin Green Oval Chain)
*Elastic Cord (From Cousin Class in a Box Kit)
*Jumprings, Clasp, and Crimps (all from Cousin)


*BODYCHAIN* 
Step 1: Lay out a bead mat (mine from Cousin) or a piece of fabric to keep your beads from rolling away, it helps! Set up a panel of beads that are about 3.5" long. I chose to use a mix of crystal, lampwork and faux stone for a lot of texture. The colors all are blues and greens, to speak to the beach theme! Cut a 5" piece of your beading wire.


Add a crimp and jumpring to one end, and thread the wire back through the jumpring and crimp shut. Add on all your beads in the correct order. Finish off the other side by threading on a crimp, then a jumpring, then thread back through the crimp...And crimp shut, trim the wire flush.


Step 2: Get out your small 3mm chain. Cut a length that is large enough to go over your head comfortably, and that stops below your collarbone. Mine was about 24". Add a jumpring to the top side of your bead panel, and connect this ring to the center of your 3mm chain (at 12" for me). 


Step 3: You should have two loose ends of chain. We will make a small mini-panel, just like we did in step 1, but this time, only make it about 1.5" long or so. Use crimps here and jumprings to finish off the panel, just like in Step 1. Be sure to stick with your bead theme here, colors and textures.


Attach each free end of 3mm chain to the jump rings; you will finish and have something that looks like my rightmost picture. Think of it as a really long necklace!


Step 5: With your larger 5mm chain, cut two 28" lengths (measurements may differ slightly, make sure it can go around your arms). Attach one end of each length to the bottom of the large bead panel (the OPPOSITE end of where your 3mm chain is attached!) and the other end to the corresponding side of the mini bead panel. 


This is what you should have now! The long necklace just gained armholes! 


Step 5: Now, with your silver 4mm chain, cut two 4" pieces and one 6" piece. Attach these to the bottom jumpring of your large bead panel, making sure the 4" pieces are on the outside of the green chain, and the 6" piece lies right in the middle. 


Step 6: To finish, add some glitz! Take your Crystazzi crystals (6 of them) and put them on headpins; cut about 1cm from the bead, and loop to close. Attach each of these in even lengths on your 3mm chain, as seen in the picture.
Your bodychain is officially finished!!! To wear, put the 3mm chain "long necklace" over your head, with the bead panel laying on your chest; stick your arms through the 5mm green chain, like a harness. It should sit comfortably and you should be able to move freely without getting caught!


*HANDCHAIN*
Step 1: With your elastic, thread on about 11 or so (enough to go around your middle finger comfortably) 6mm metal beads. Add on a crimp, and crimp shut. Cut the extra elastic.


Step 2: Take your 4mm chain and measure a length that goes from the base of the middle finger to the top of your wrist. Mine was about 3.5" long. ( I just used this chain as a measuring system because it layed flat. I will NOT be using this chain in making the hand chain). With this measured, cut a 5" piece of beading wire. Attach a jumpring to one end, and crimp on with a crimp.  Attach this jumpring to the center of your bead ring (the opposite side of your crimp so when you wear the crimp faces underneath and you don't see it). Add your beads to create that 3.5" panel; use a crimp and jumpring on the other side to finish off. 


Step 3: Measure your wrist; mine was about 6". You want this to not be very loose, so measure as close as possible. Cut this length of your 5mm chain, and add a clasp to the ends. Right in the center of this chain, add the jumpring from the other side of your bead panel. Now, add one more jumpring in between the beads, about 2" down your bead panel. Cut two lengths of 3" 3mm chain (again, you may need to alter your measurements depending on how big your hand is. A good thing about unsoldered chain is that you can keep adjusting the length! Attach one of the ends to this jumpring.


Step 4" Attach the other end of your chain to the 5mm chain, about 1.25" up from the clasp. To wear, first put your ring on, with the bead panel layin on top top of your hand. The 5mm chain should fall down, and clasp it shut like you would a normal bracelet. You should be able to still move your fingers freely, but it shouldn't be hanging off real loose! If you need to edit your lengths, do so!
This is great for the beach; it can go over your cover-up...


Or on when you are sunbathing!


Instructions and photos (excluding very first image of models wearing other body chains) copyright Allison Beth Cooling. Don't post this tutorial or any of my pictures without crediting me, and don't claim as your own please!
A special thanks to my model, Karlee Dewan

Thursday, August 15, 2013

Tips for Bokeh Photography

"Bar Study" copyright Allison Beth Cooling
*Instructions below for using a DSLR camera. I have a Canon Rebel T3i. Instructions may have to be altered a bit depending on your camera*

Here is a little break from my usual jewelry tutorials (I am an "art blogger", and art incorporates other facets than just jewelry!)........ One great form of art is photography; a picture really truly is worth a thousand words. I love how photographs can capture a certain mood, time, feeling, state of being, stage of life. Just like how powerful photojournalists' images can be, and how influential these images are within history, photography is a form of art which is much more conceptual and deeper than just taking a picture of a pretty flower.

Sure, a pretty flower makes for a very pretty photograph, which is totally fine. I love taking pictures of this kind, but also push myself to take more conceptual, abstract, meaningful images. Photography can span a ton of different styles, and trying each style out can really help you grow as an artist. 


Night Post. Image copyright Allison Beth Cooling

This post will teach a little about Bokeh photography. Bokeh means blur, and references a style of photography focusing on blurred (whether partially or completely) images. In college I learned about famous photographer Uta Barth; her whole style focused on Bokeh, sort of capturing "air" instead of focusing on the subject. All of her images have a very minimalistic, dreamlike quality to them, abstracted to where you can't really tell what the scene actually is. I think this is why this style is very thought-provoking; it tempts the onlooker to search for a deeper meaning, rather than just looking at a pretty flower. 
The technique I use for getting Bokeh images is actually really simple, and instantly gratifying. The hardest part is going to be deciding on how blurred you want your image, and adjusting accordingly. Once you get the hang of it, it's easy!


Exhibit A:
The image you see on your left is the normal picture. A pretty cafe in Estero, FL  from when I went to Miami earlier this summer. This cafe set is about 25 feet away from me. 
To get the middle picture (slight blur): Point your camera at your feet, and press the shutter halfway down to focus; then, with your finger still pressing halfway down, bring your camera up at your subject; it should be blurry in your viewfinder, and press it all the way down to take the image. Depending on how far away your subject matter is, the amount of blur will vary.
To get the full blur (very Uta Barth like!) put your hand about a foot in front of your camera lens, and press halfway down to focus. Simply keep the button halfway down, point at your subject, and take the shot! This will give you much more of a blur.
The closer the object is you set your focus to, the blurrier the image will be.


Another example; the left shows a full blur (with the hand technique) and the right shows a small blur (focusing on the ground). I was standing a lot farther away from these trees, about 40 feet or so. You can see that the small blur image is less than the cafe picture above. This is because the image is farther away; scenes farther away from you will require focusing on your hand to get the full blur.

Some scenes will lend themselves better to Bokeh than others. It's always good to experiment! This is a flower garden scene. I'm not a big fan; it just isn't abstract enough, and there are too many of the same scale figures, and not enough contrast.


Scenes that work better involve variances in scale, color, value. Or, images where Bokeh will help push forth an idea. Here, I use palm trees and abstracted them with Bokeh to give a dreamy feeling, like how I wish I lived someplace tropical! 


This image was turned to a black and white, beacause Boken images lend themselves very well to black and white versions. Just make sure that there is a lot of value contrast (the lightness/darkness of the image, not necessarily the colors). View this example below:


The color version is cool, but the black and white, to me, seems more elegant and abstracted, in a way. This will be up to you to determine how you want to go about making your final photo!
I simply applied the Black/White Adjustment Layer in Photoshop to create these images. It is the easiest way to do so! 
One more example is below:


Again, I like the color version, but prefer the black and white.
Hope this was helpful! The best way to test this out is to just experiment, and find what works best for you. With abstract photography, there is no right or wrong answer! If you like to print up your photos, these Bokeh abstracts work really well as large wall prints. It enhances the airy, dreamy feel, and gets the message across better. I would recommend using some of your favorites as wall art/canvas prints to style your house or apartment! It's always better to have your work in your space instead of something you bought at Ikea!

All images here copyright Allison Beth Cooling. Do not use or copy please.


Wednesday, August 7, 2013

Anthropologie Stormy Seas Necklace; an Elegant Re-Vamp!


This Anthropologie Stormy Sea necklace is an oldie but goodie; I have been wanting to make a tutorial on this for a long time, and finally got around to it. What I love about it, like any Anthropologie item, is the uniqueness of it. It features drop beads and closes with a cotton tie. Plus, statement necklaces are totally in fashion right now. Designers like Kate Spade are totally on board with the trend!
*EDIT* Today, a day after I made this post, I got my August 2013 issue of Harper's Bazaar. What were the fashion/accessory features throughout the magazine??? BLACK, WHITE, and GOLD accessories. All in that color combo. Designers like Nicholas Kirkwood, Michael Kors and Lanvin's fall collections all feature these colors. What's also gonna be hot is chunky chains, chunky necklaces, and black boots/booties. What's more perfect to make for the upcoming fall trends than this necklace??? 


Another huge trend throughout the summer has been black and white, basically started by runway shows such as Marc Jacobs back this spring.


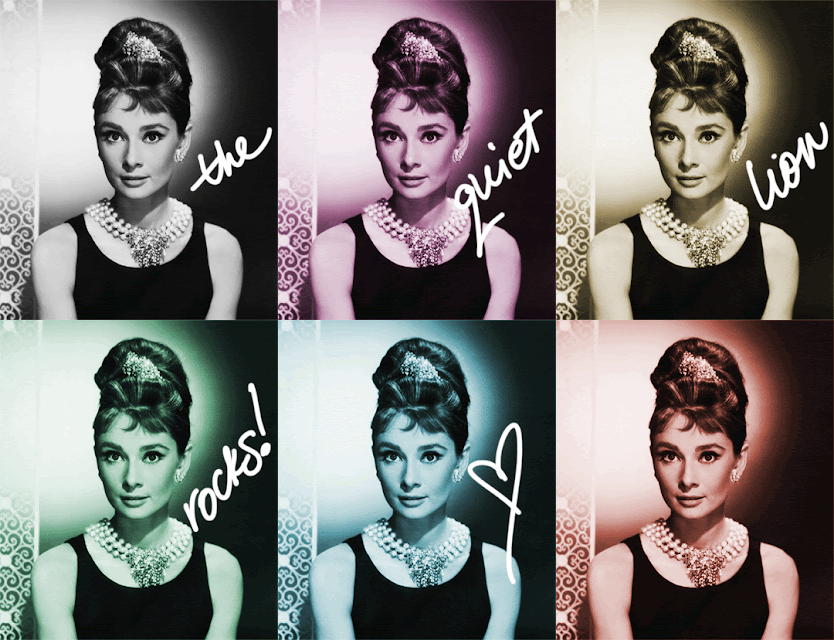
Obviously the trend has caught on. I went to Forever 21 the other day and the whole top floor was black and white! Part of my inspiration for this look came from Breakfast at Tiffany's; total elegance, black and white with a little gold (instead of silver) added in. I just happen to be partial to gold, use whatever metal color you like. I made this tutorial using mostly Cousin products, showing that you can make awesome jewelry without having to spend the $100 and up on "designer" pieces!


This is obviously a lot more glam than the original Anthropologie necklace. You can feel free to alter what beads you use, if you want a more casual feel skip the top drilled gold beads, or maybe switch the crystals for pearls for a new take on Audrey Hepburn's style.


I couldn't help myself, sorry. Like she would ever say that!? Oh well, it's my "artistic license...."
Ok, let's finally get started, shall we?
*mm always means millimeter* 


Step 1: Gather materials. Needed are pliers (here by Cousin), a plain white cotton tee shirt, 20mm acrylic briolettes (from Cousin), clear 6mm, 10mm and 15mm acrylic crystals (here by Cousin), 4mm metal beads, 10mm faceted gold beads, top drilled gold metal beads/charms (mine were 1.5" long, and hollow on the inside like tubes), jumprings and crimps, and fishing line (8 pound). 
Instead of the top drilled metal charms, try spike charms for a real edgy look (if you're not into Audrey.....)  You can find beads like this at Michaels or JoAnn.
I always like to use fishing line because it is clear and you get a lot more than if you buy a small little beading cord package! The kind I have is 8 pound so it is thin and not bulky.


Step 2: Cut about a 4' long piece of fishing line and fold in half. Thread on a jumpring and crimp, and at the halfway mark secure on the jumpring by crimping the clasp. It helps to use a bead board to lay out the composition of your beads. This is going to be the shorter strand of beads, so that the strand will be about 12" long. I started out with the 10mm crystal, alternating with metal beads, the briolettes and the metal charms, adding a large 15mm crystal in the very center.


Step 3: After stringing on all the beads for the shorter strand, use the other empty fishing line to create your longer strand. I played around with my composition; most importantly, you want this strand to be longer, mine was 14". 


I started by adding two (NOT THREE as the pic shows, sorry) 6mm crystals alternating with the metal beads, then used my 10mm crystals and faceted metal beads here (view pic below to see what combo I ended with)


The center of this strand has that metal faceted bead, and the beads lay nicely with the briolettes alternating spaces. When your strand is finished, add a crimp through both empty ends, then a jump ring. Thread back through the crimp, pull the line tight (not TOO tight though, you want a little bit of wiggle room) and crimp shut. Cut excess line off. 


Step 6: Cut four long pieces of your tee shirt (I went around the stomach area, about in .5" wide strips), and thread two through each jump ring. To tie, simply gently knot the strips together!


This really creates a statement! Pair with a totally on-trend black and white check dress (here, from Generation Bliss) and simple black peep-toe heels for a totally chic look!


Even though these gems are acrylic, they definitely sparkle.....


GOLD+BLACK+WHITE= totally awesome. In my book.
And to end with a theme quote: "Anyone who ever gave you confidence, you owe them a lot".
-Holly Golightly, Breakfast at Tiffany's, 1961


Instructions and all photos copyright Allison Beth Cooling. Don't post this tutorial or any of my pictures without crediting me, and don't claim as your own please!