Showing posts with label wire. Show all posts

Monday, February 23, 2015

tulum turquoise earrings


Pretty hues of turquoise blue, beige, antique copper and gleaming gold mix here to create a totally tropical-bohemian look! This chic fiesta of hippie goodness just reminded me of something you'd wear on the sandy beaches of Tulum (or really any other oceanside getaway!)…..


These chandelier-style earrings are surprisingly light, and surprisingly easy to make. I've started with a hand-forged wire frame, hammered to give a rustic texture and evoke a more antique vibe. Wrapping gemstones around this wire frame, and adding chain and bead dangles all combine to create a very intricate, very unique earring.


When I first got these turquoise and howlite rounds from bead store PandaHall.com, I knew I wanted to create something with a more neutral color palette. My love for mixed metals spurred the chandelier earring idea, thinking that copper and gold, both "warm" colors, would blend well together.


These are larger earrings, made so to show off the textured wire frame. I'll show you some substitutions later, just in case you want to make a smaller earring, change up the colors, or even try different shapes. Let's get started!


Step 1: Gather materials. I used 8mm gemstone rounds from Pandahall, 4mm turquoise rounds from Pandahall,  24 gauge Cousin gold wire, 16 gauge Cousin copper wire, wire cutters and pliers, gold eyepins, gold fish hooks, jumprings and finally a nailpolish bottle (to wrap around).


Start off with your 16g wire. Wrap a couple of times around your nailpolish bottle. Gently take/slide this large coil off - cut through the coil at the top. With two of them, create loops at both raw edges with your pliers.
You can obviously use a round bottle, or really any shape. I like the diamond/arrowhead/triangle form of this one, because it is a little different than the ordinary!


I went and hammered these gently, to create texture and give it more of a weathered look. I literally used a regular hammer and concrete (in the garage), not a nice bench block and jewelry hammer. This gave that rough texture (that I prefer), but if you want a clean look, you've gotta use the ones made for jewelry. I am just to cheap to buy that, and prefer a rustic look! Especially for these earrings.
With your eye pins, create two beaded links, one on each side of the wire frame. Add a bead link on top of each previous one, and connect them with a jumpring- add a fishhook to top.


With about a foot of 24g wire, tightly coil the end around the bottom "v" of the frame- wrap about 3 times. Add a bead, catch it in this wrap, and wrap around twice again. Repeat twice with the turquoise. Now, add three howlite wraps, then repeat with three turquoise. Wrap and cut flush with the excess wire.

This step can be done after hammering (in step 2) and it is much easier to wrap this way! Beginners please do this! Then resume with the rest of step 2.


I then took about a 2" piece of chain, attached it with a jumpring to the wire frame's top loop. Attach it to the other side with another jumpring. Finally, I added a chain piece (maybe about .75" long) to that top jumpring, and added a turquoise charm at the end.
 

Not too bad, right?! Like I said, if you're not into mixed metals, copper always pairs well with turquoise, so you can use all copper findings. You can even try all silver for a more modern look. The 8mm howlite beads from Pandahall come in an array of colors, so you can choose if you want to use the beige or colored ones.


You could also make these smaller by using a smaller nail polish bottle. The, reduce the number of beaded wraps and bead links to keep the proportions. I also used a square nail polish bottle - try a round one for a different look.
I could totally see these pairing well with a flowy maxi dress and sandals for a chic beach outfit. If you're not anywhere near the beach, like me, don't fret. Pair with a long tunic top (in a neutral color) and dark skinny jeans. I add combat boots (when do I not) for edginess. You could also wear with flats or even heeled booties.


If any of you crafters follow this tutorial, be sure to take pics of your final result! Tag me @quietlioncreations on Instagram and I will repost you!


All photos copyright Allison Beth Cooling for Quiet Lion Creations. Do not post or reuse without crediting me and linking to me!

Sunday, December 22, 2013

Easy Geo Earrings: "Handmade Holiday" Project 007


My last tutorial before X-mas, and the last in my "Handmade Holiday" initiative! I've picked the easiest, quickest and cheapest tutorial for last. You will create a pair of geometric earrings that are simply made from a cut crystal and bugle beads. 


Like most of my tutorials, this one is highly customizable; pick your favorite colors and metal style to make a look your own! Make sure you choose a hexagon-cut crystal (mine from Cousin) to get this look. If you don't care about the geometric theme, try out a round crystal or even a teardrop crystal. Whatever you like! 


These seriously take 5 minutes to make, I timed it. I chose a color scheme of warm orange and light blue, complimented by gold for a contrasting yet cohesive look.


The small, dainty size of these earrings are great for everybody, and they aren't too heavy. The crystals make them dressy, but the cool bugle beads and simple design give them a casual vibe.


Make these for anyone on your last-minute shopping list; they won't  be disappointed!!


For a casual cool look, pair these simple earrings with a bright, on-trend watercolor print top and finish with both black leggings and black sneaker wedges.
Leggings by Tory Burch, top by Generation Bliss.

Are you ready? Let's get started!


Step 1: Gather materials. Needed are crystals, pliers (round nose), wire cutters, gold fishhooks, gold eye pins, and extra-long bugle beads.


Step 2: Add your crystal to the eye pin. Eye pins differ from headpins because they have a loop on the end, not a metal stopper. We need the loops so we can attach the beads to one another! Bend the eye pin at a 90 degree angle right after the bead. Cut about 3mm from the bead, and loop to finish. You should have the second picture.


Step 3: Add a bugle bead to an eye pin, and repeat. Repeat the last step's technique of bending, cutting and looping to create two bugle bead links. You should have the last picture.


Step 4: Attach your bugle bead links to each side of the crystal, by twisting the loop open then twisting it back. Finally, add your fishhook to the empty ends of the bugle bead links! Your crystal should hang nicely in the middle. Repeat all the steps to make another earring.


See how simple?!! 


Ok, you've only got a couple more days left. Now go and make your earrings!!


All images & tutorial copyright Allison Beth Cooling; do not use/post without linking back to me.

Thursday, November 28, 2013

Trinket Necklaces- "Handmade Holiday" Project 005


These dainty necklaces are just perfect for any outfit. The mixed metals offer a ton of shine and subtle contrast. I love mixing metals, mainly because I am obsessed with anything shiny! You have to be careful when mixing though, otherwise the look can go a little haywire. 


These metals all work together here, because the metal type (all brilliance shine) match and the scale of the materials are all about the same. I wouldn't mix a dark, antique, dull-shine metal with a high-shine silver one, it may end up looking a little strange. Also, don't finish a piece with silver findings if you've used gold metal in the rest of the design. Keep the look consistent by finishing with the same metal you've been using.
Of course, I know there may be exceptions to my rules, there always is! That's why you should experiment and see what you like!
These necklaces when layered give a cool boho-look, but when worn alone offer delicate detailing to an outfit. These are right on-trend, with most of Hollywood ditching huge, clunky jewelry for smaller, daintier pieces. These wear like a "second skin", and it's ok if you forget to take them off before bed. Obviously, this no-fuss jewelry is popular with the busy Hollywood socialite population. Jewelry designer Dannijo has just paired up with actress Rashida Jones to create a line featuring teensy gold earrings and tiny charm necklaces, all meant to be worn every and all day.


To style these delicate necklaces, pair them with a bright print pant, simple black tunic, and contrasting bag. Add edgy combat boots to fill out the look! This is great look for shopping or walking in the city!

*Outfit Credits: Pants by Erdem, bag by Marc Jacobs, boots by Aeropostale*


Ok, let's get started….


Step 1: Gather materials. Needed are pliers and wire cutters, 4mm or 3mm metal beads, gold or silver cable chain, 28g wire, and either 20 or 18g wire.

I used Cousin's 28g wire and Gold Elegance 14K plated chain, because the quality is much better. If you plan on giving these as gifts, I strongly suggest using Cousin's "Elegance Metals" line, because these are all either gold plated, or stainless steel, or platinum plated. They won't tarnish like ordinary chain, and make for better gifts!
You can get Cousin materials at any major craft store, but I like Michael's the best!


Step 1: Cut a 3" piece of wire. With your pliers, loop the ends.


Step 2: Cut a foot of your 28g wire. With the end, wind around the wire right up against the loop about 5 times. Add on a metal bead. Hold it against the wire, then wind the wire around the frame, right next to the bead, keeping it tight. Wind around 3 times. Add another bead, and continue this process until you reach the end.


Step 3: At the end, wind the wire around just the frame for another 5 times, matching the beginning. Then cut the wire flush. Add your silver chain with silver jump rings on each loop of the frame to finish!


These would be great to give to your cool girlfriends; they will appreciate the tiny details here and will love that they can throw this necklace on with any outfit!


I made a double-decker one by attaching each loop with a jumpring, then adding another ring to the top loop, and attaching that to the chain.
Wear one or more!


All images and tutorial copyright Allison Beth Cooling. Do not use/post this tutorial or pics without crediting me!


Tuesday, October 29, 2013

Metro Pearls Bracelets


These bracelets are simply chic; the champagne color of the wire and gold rings, plus the matte shine of the pearls makes for a very "cocktail hour" type of bracelet! The contrast between the classic pearls and more industrial look of the exposed wire and metal rings makes for a truly unique piece of wrist candy!


All of my materials came from Cousin Corporation; the beading wire and jumprings I used are Beadalon Brand, which are now sold by Cousin! These materials are great and high quality, and are very versatile. In this tutorial, I use jumprings as beads instead of the traditional chainmaille application. 


I named them "Metro Pearls Bracelets" because they feel much more metropolitan to me than traditional. Plus, the channel crystal bead in the center is a more contemporary take on the classic rhinestone! 
Let's get started!


Step 1: Gather materials. Needed are pliers, a clasp, crystal spacers (mine from Cousin), Beadalon Champagne Stringing Wire (mine from Cousin), 6mm or 8mm pearls (mine from Cousin), and Beadalon Artistic Wire jump rings (mine from Cousin) in gold or brass.
These jumprings are great because they are non-tarnish! 


First off, make sure you close all the jumprings; in the pack, they aren't fully closed. Simply close with your pliers by twisting, NOT pulling, so that the ends meet up together.

Step 2: Measure your wrist, now add 2". Now, double that length and cut your Beadalon wire to that length. Fold your wire in half and string on your clasp. String on your crimp through both wires and crimp shut right against the clasp. Now, string on a pearl on each wires, then a jumpring through both wires, creating a group. Keep up with this technique until you reach the center of your bracelet. For the center motif, string on three jumprings through both wires, then your crystal spacer, then three more rings. Then, continue your pattern until your end. To end, simply string on a crimp through both wires, then a jumpring; string back through the crimp, pull tight, and crimp. Cut with your pliers flush so the wire doesn't stick out. 


These are addicting to make! They are so totally fast, and there are no hard techniques involved. They look ultra chic because of the mix of classy pearls and contemporary metal wire, and would be great to give as gifts for any occasion. 


These are great stacking bracelets, because they sit together nicely and can be made with different size pearls. I used 6mm pearls for the champagne and mocha colored bracelets, and 8mm for the dusty grey bracelet.


If you share/use/post this tutorial, you must link back to me please. All photos  
copyright Allison Beth Cooling. Do not use photos without crediting me!


Thursday, October 24, 2013

Behind the Chandelier Earrings


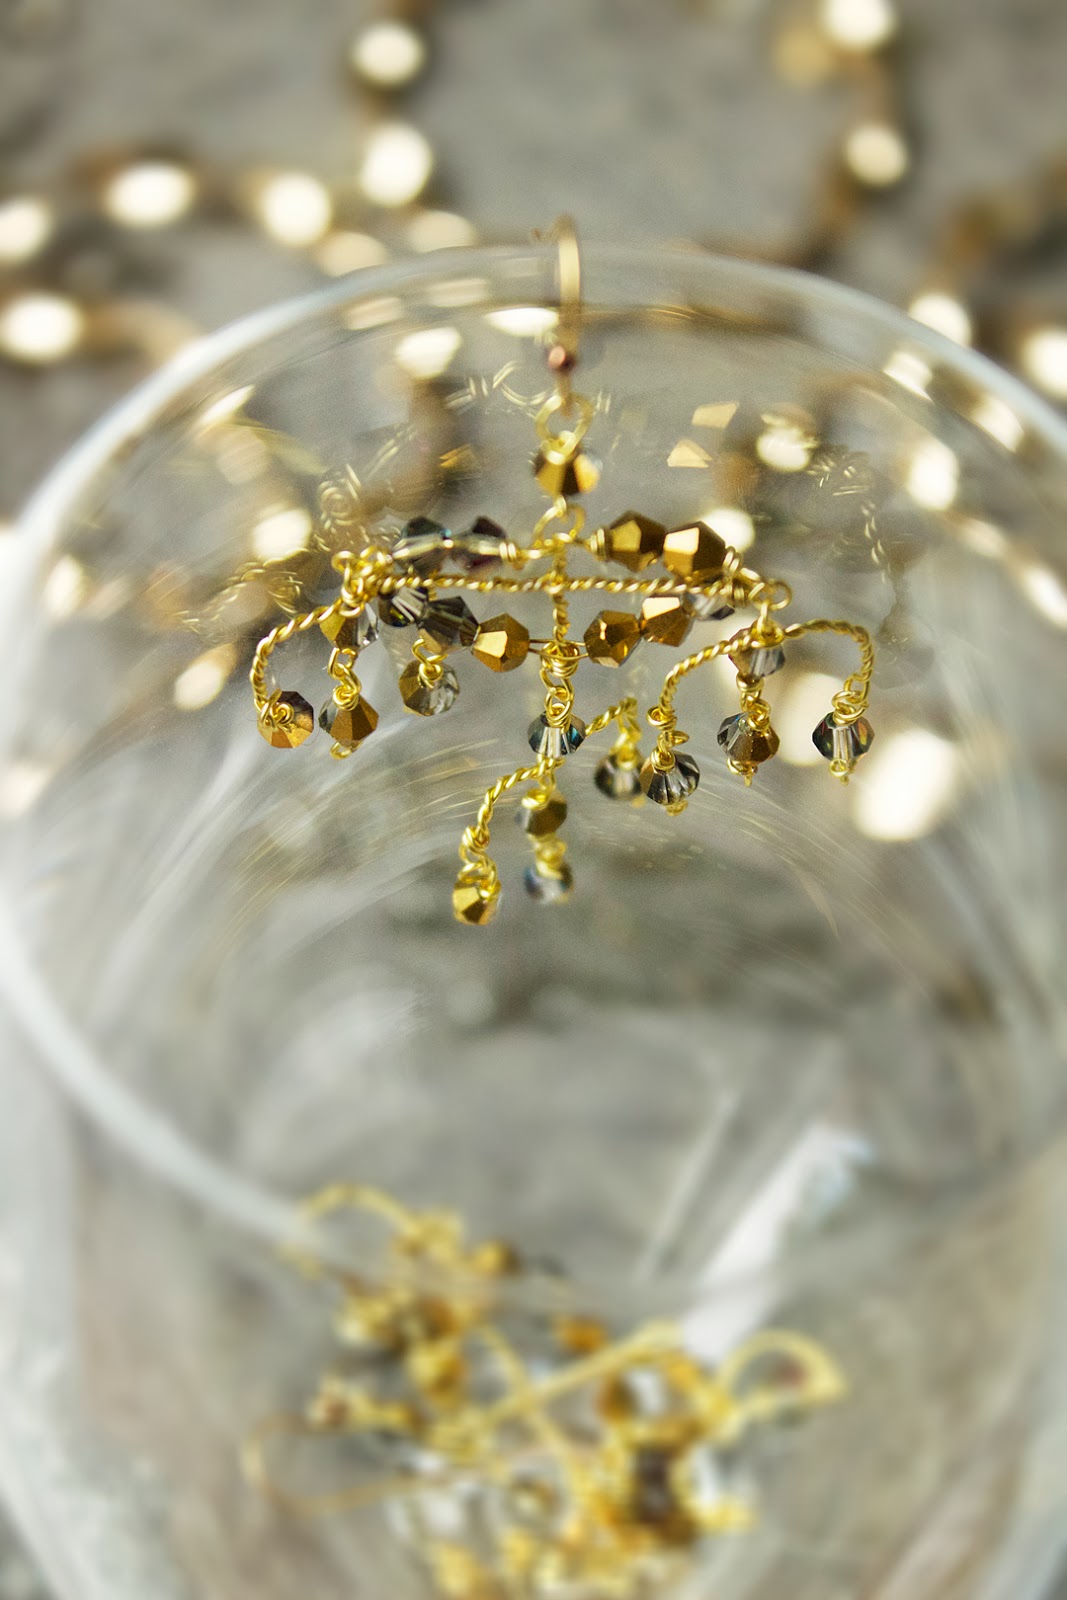
These Perriwinkle Frost Chandeliers by Phillipa Kunisch at Anthropologie are so dainty and elegant. I love the use of only wire and crystal to make such an intricate earring! These inspired me to make a version of my own.


I really love gold, and these two-tone crystals by Cousin were the perfect choice to use because of their gilded look! That paired with the thin, textured twisting of the wire and dangles that flow in the air make for a pair of sure statement earrings! For my DIY version, I used smaller crystals, but more of them, to create even more sparkle.


People will have no idea that you made these yourself, trust me! They will be great for wearing to upcoming holiday parties or any other special events.


Did I mention that they are super lightweight?? Seriously, usually chandeliers are lobe-stretching heavy, but these are light and airy, which is good for everyone!
Let's get started.


Step 1: Gather materials. All you need are pliers, gold earwires, 24g gold wire (mine from Cousin) and 4mm or 5mm crystals (mine from Cousin).


Step 2: Make wrapped links with two of your crystals, cutting the wire flush to finish. Cutting the wire flush on each link will be key here, to keep a clean look to your earrings! Add the top loop of each link to the earwire.


Step 3: Make two more links, but this time with two crystals per link. Cut about 6" of wire, string on the links you just made AND the bottom loop of the link attached to the ear wire, and group all these links together by holding the joint with your roundnose pliers and twisting the wire against itself with your other hand. It should look like this (bottom pic).


Step 4: Continue wrapping the wire until it is about 2cm long, and finish with a wrapped loop.
I repeated the last step and this step for the other earring.


Step 5: To make the cross-section, add on another 6" piece of wire on the open end of one of the 2-bead links. Fold in half and then start twisting the wire on itself, like in step 3; when the wrap is about .5" long, insert the vertical twisted wire inbetween the wires, and twist tightly to hold in place; twist another .5" until you reach the other side of the earring; finish off this horizontal piece by ending with a loop, catching the 2-crystal link's open end into the loop. It should look like this (last picture).


Step 6: Add two 1-bead links to either side of the horizontal crossbar. To add the chandeliers, cut about a 4" piece of wire, and fold in half. At the half, make a small loop and then twist the wire upon itself just like how you have been doing. When you reach a little over 1cm of a twist, insert the top loop of the 1-bead link you added, and twist tightly to secure like you did with the vertical crossbar in the last step. Finish off with another 1cm of wrapping, then end with a loop. Repeat with the other side of the earring. Add 1-bead links to the empty loops  on the chandeliers (4 in total).


Step 7: Add a final chandelier to the bottom loop of the central bead link, then add 1-bead links to the empty ends of the chandelier. To add the crystal finishes in the center, cut about a 5" piece of wire, and fold in half. Thread on to the side of the horizontal crossbar, right at the halfway mark, and twist to secure. Add three crystals, then thread through the vertical crossbar, then another 3 crystals. Wrap at the other side of the horizontal crossbar to secure, and cut flush. The arrows show where to start the wrap, and the thread-between of the vertical crossbar!


To finalize, add one more crystal drop at the center chandelier. 


Even though these earrings look expensive, they are so cheap to make! The materials cost less than $10 all together, while the Anthropologie version is about $250. 


You can make these in all colors of crystals; try using silver wire if you like silver, or maybe a copper wire would look cool with some turquoise-colored crystals, for a western-inspired look?! The possibilities are endless!


If you share/use/post this tutorial, you must link back to me please. All Photos (except Anthropologie one) 
copyright Allison Beth Cooling. Do not use photos without crediting me!