Showing posts with label earring. Show all posts

Thursday, August 6, 2015

Hawaiian Orchid Earrings


I literally cannot get enough of these earrings. The mix of bright gold metal, ab coated glass beads, faceted mirror crystal and filigreed coins create totally luxe-looking ear candy. And, what's best about these is that a beginner beaded can make them. I'm serious.


I got the idea for these after seeing those beautiful golden orchid posts from Doreenbeads. I had never seen something like this; usually, all that's sold are plain silver or gold posts. These, of course, are pretty amazing, and great for those who don't like dangle earrings. You don't need to decorate these with much-- a simple beaded charm completes the look. I'll show you the steps I took towards making a chain drop, but you can customize this to create looks all your own.


These earrings totally remind me of Hawaii. It's a place I've never been, but I feel is totally up my alley. Fresh flowers, salty air, the Island vibes and plenty of cool landscapes and terrain (great for photoshoots!) are all things I love. The Hawaiian orchid is one of my favorite flowers (as well as Plumerias, also native to Hawaii), so these earrings are perfect for anyone going to the beach. They give an upscale bohemian touch to any outfit.


Feel free to play around with colors and bead types, to find combinations that you like best. I stuck with blues and oranges here to compliment the gold tones. Other colors that I could see working are deep amethyst hues, milky whites or even rosy pinks.


Step 1: Gather materials. Needed are Gold Orchid earring posts (from DoreenBeads.com), small gold link chain, gold headpins, glass crystals (I used a combination of 4mm faceted blue rounds and 8mm teal rondelles, both from DoreenBeads.com) glass AB coated beads (16X13mm blue glass beads, 23mm glass twisted beads, 18mm champagne teardrop beads -- all from DoreenBeads.com again!), round nose pliers, flat nose pliers and wire cutters.


Step 2: Add your glass bead to the headpin, and create a top loop with your round nose pliers. Repeat. Cut a 2" piece of chain (or however long you want your drops) and repeat.


Step 3: Open the top loop and attach to the chain piece. Repeat with the other piece.


Step 4: If you want to add another smaller dangle, repeat the process using your smaller round faceted crystals and add this drop AND the twisted glass drop to a jumpring (4mm). Add the jumpring to the bottom attachment on the orchid post and close.

Pretty easy, right?! I'm gonna leave you with more inspo photos to follow.


COPYRIGHT
Because I take all photos for my blog, the images within this post are all copyright Allison Beth Cooling for Quiet Lion Creations. If you'd like permission to use a photo, email me at allison@quietlioncreations.com

Thursday, October 24, 2013

Behind the Chandelier Earrings


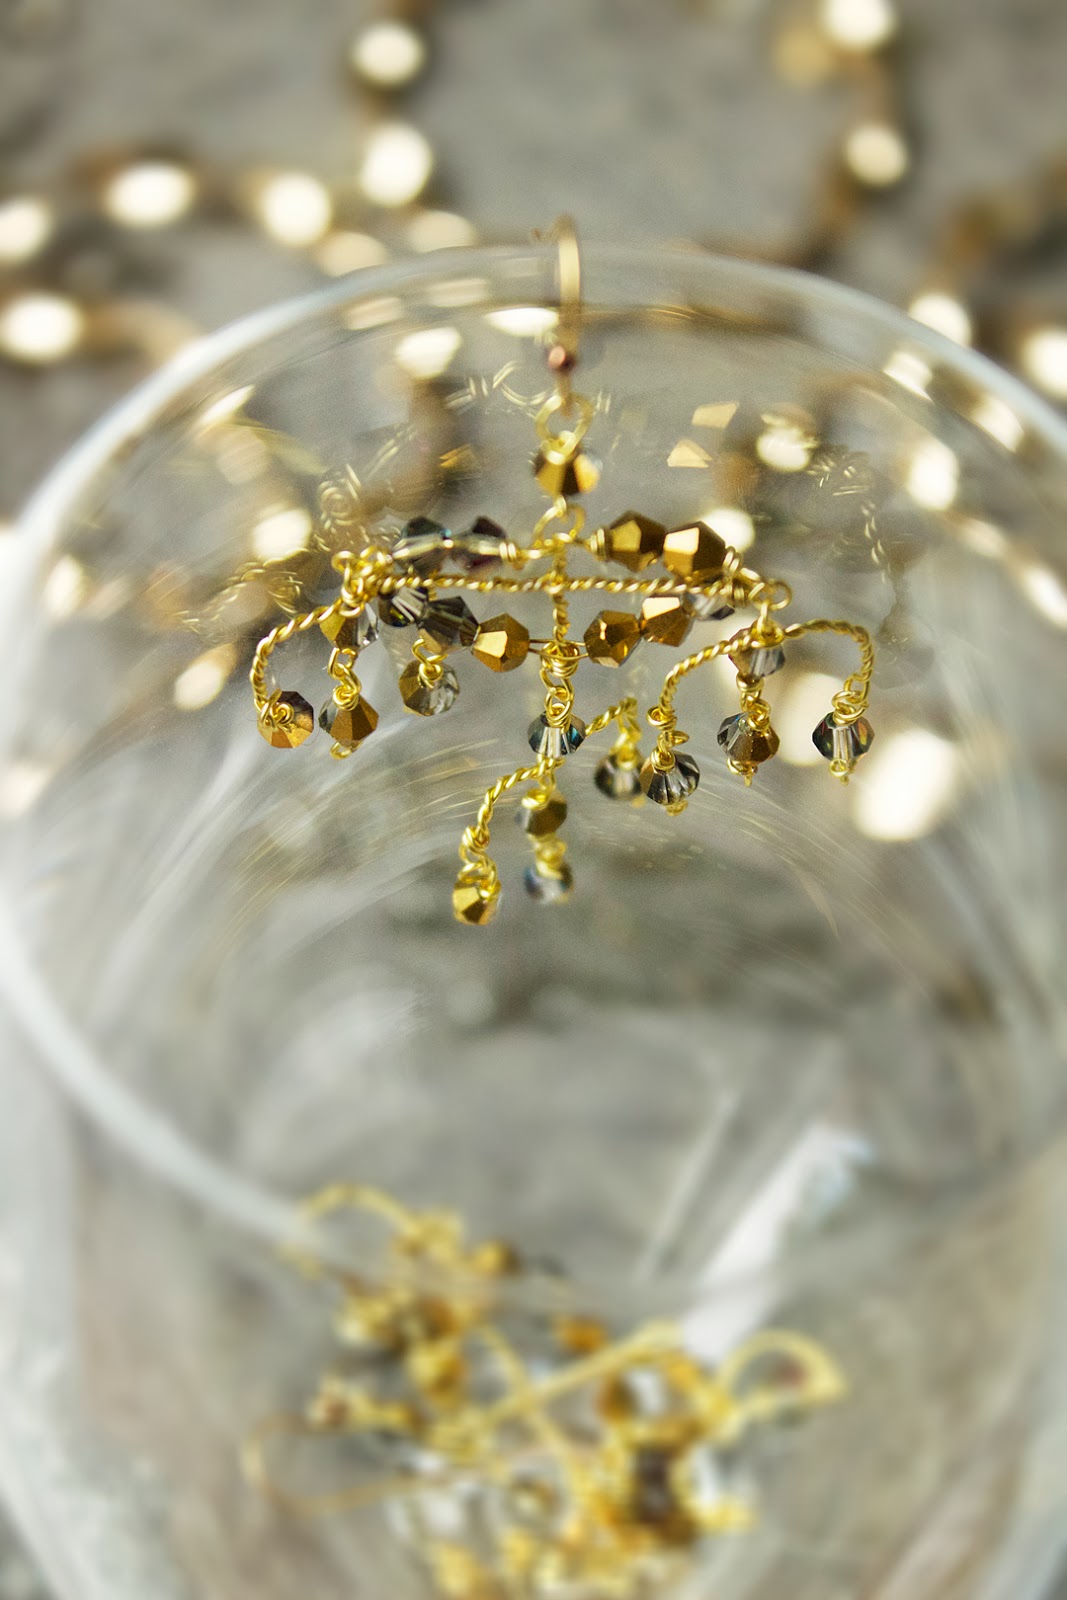
These Perriwinkle Frost Chandeliers by Phillipa Kunisch at Anthropologie are so dainty and elegant. I love the use of only wire and crystal to make such an intricate earring! These inspired me to make a version of my own.


I really love gold, and these two-tone crystals by Cousin were the perfect choice to use because of their gilded look! That paired with the thin, textured twisting of the wire and dangles that flow in the air make for a pair of sure statement earrings! For my DIY version, I used smaller crystals, but more of them, to create even more sparkle.


People will have no idea that you made these yourself, trust me! They will be great for wearing to upcoming holiday parties or any other special events.


Did I mention that they are super lightweight?? Seriously, usually chandeliers are lobe-stretching heavy, but these are light and airy, which is good for everyone!
Let's get started.


Step 1: Gather materials. All you need are pliers, gold earwires, 24g gold wire (mine from Cousin) and 4mm or 5mm crystals (mine from Cousin).


Step 2: Make wrapped links with two of your crystals, cutting the wire flush to finish. Cutting the wire flush on each link will be key here, to keep a clean look to your earrings! Add the top loop of each link to the earwire.


Step 3: Make two more links, but this time with two crystals per link. Cut about 6" of wire, string on the links you just made AND the bottom loop of the link attached to the ear wire, and group all these links together by holding the joint with your roundnose pliers and twisting the wire against itself with your other hand. It should look like this (bottom pic).


Step 4: Continue wrapping the wire until it is about 2cm long, and finish with a wrapped loop.
I repeated the last step and this step for the other earring.


Step 5: To make the cross-section, add on another 6" piece of wire on the open end of one of the 2-bead links. Fold in half and then start twisting the wire on itself, like in step 3; when the wrap is about .5" long, insert the vertical twisted wire inbetween the wires, and twist tightly to hold in place; twist another .5" until you reach the other side of the earring; finish off this horizontal piece by ending with a loop, catching the 2-crystal link's open end into the loop. It should look like this (last picture).


Step 6: Add two 1-bead links to either side of the horizontal crossbar. To add the chandeliers, cut about a 4" piece of wire, and fold in half. At the half, make a small loop and then twist the wire upon itself just like how you have been doing. When you reach a little over 1cm of a twist, insert the top loop of the 1-bead link you added, and twist tightly to secure like you did with the vertical crossbar in the last step. Finish off with another 1cm of wrapping, then end with a loop. Repeat with the other side of the earring. Add 1-bead links to the empty loops  on the chandeliers (4 in total).


Step 7: Add a final chandelier to the bottom loop of the central bead link, then add 1-bead links to the empty ends of the chandelier. To add the crystal finishes in the center, cut about a 5" piece of wire, and fold in half. Thread on to the side of the horizontal crossbar, right at the halfway mark, and twist to secure. Add three crystals, then thread through the vertical crossbar, then another 3 crystals. Wrap at the other side of the horizontal crossbar to secure, and cut flush. The arrows show where to start the wrap, and the thread-between of the vertical crossbar!


To finalize, add one more crystal drop at the center chandelier. 


Even though these earrings look expensive, they are so cheap to make! The materials cost less than $10 all together, while the Anthropologie version is about $250. 


You can make these in all colors of crystals; try using silver wire if you like silver, or maybe a copper wire would look cool with some turquoise-colored crystals, for a western-inspired look?! The possibilities are endless!


If you share/use/post this tutorial, you must link back to me please. All Photos (except Anthropologie one) 
copyright Allison Beth Cooling. Do not use photos without crediting me!


Sunday, May 5, 2013

Cheap-o Pave Crystal Earrings


Another one of my "cheap-o" tutorials, now for earrings!
You don't have to spend big bucks to make a pair of those popular pave crystal earrings. Pave is a type of gemstone setting where the gems are uniformly placed, and placed close together. This technique is used in these earrings, to give maximum shine! However, we are not using diamonds or expensive gems......


We are using acrylic nail gems!


You still get shine, yet don't have to shell out a lot of cash. Along with a couple more ingredients, these earrings come together nicely and can be made in many different colors!


Let's get started!


Step 1: Gather materials. Needed are acrylic nail gems (similar here), earring posts, polymer clay (I use Sculpey), a toothpick and E-6000 glue. DO NOT use superglue for this because it will leave a white dusty look on the clay.


Step 2: Make two uniform sized marbles of clay, flatten a little so that one side stays dome-like, while the other gets flat to lay against the ear. It helps to push down the sides of the marble gently against a flat surface. You have to pick a clay color that matches your gems, so the clay background won't stick out. I have red gems, so I have red clay here.


Step 3: Get all your gems ready. Bake the clay  (I do 15 minutes at 125 degrees in a toaster oven). Take your toothpick, pick up some glue, and attach the post to the flat side of the cooled clay.


Step 4: Stabilize your earring post (after it has dried) by pushing it onto a piece of scrap clay. This helps you while holding it, you don't have to try to hold onto a little post! Pick up a teeny tiny bit of glue on the toothpick, add it to the back of your gem, and press onto the clay. It helps to start at the very bottom, work a row around, and then make another row sitting on top of the last one. Continue in this pattern, until your whole clay is covered in the gems. Let all the glue dry.
Repeat with the other earring!


Finished! The amount of gems will vary depending on what size you use. I used 3mm gems.
You can make these in different colors, different sizes and shapes! 


Very cool!


Do not use my photos without crediting me, and if using this tutorial please link back!


Friday, April 26, 2013

Beginner Tutorial: Easy Drop Earrings


The next installment in my "beginner tutorials" phase...
earrings! These are so simple and don't require any complicated wireworking skills to create.


Feel free to use any kind of beads, just make sure you have a statement bead and a smaller crystal or pearl to keep the look elegant.


These beads are just made with a headpin, bent to form a drop earring shape.


Let's get started!


Step 1: Gather materials. Needed are pliers, two larger beads, two long headpins (about 3") with a ball end (you can find them at craft stores), and smaller crystals or pearls. If you can't find the ball-end ones, you can use regular headpins but the look won't be as elegant.


Step 2: Take your headpins, and mark about 1cm from the end with a sharpie. This is where you will bend it. If you have longer/larger earlobes feel free to mark at 1.5cm.


Step 3: Thread on your bead and then crystal. Position your pliers right below the mark you made. Take the end, and gently bend it back to create a notch in the headpin.
You have just created the first earring!
To get the Sharpie mark off, dip your finger into water and just rub it off. 


Repeat the last step for your second earring. If you see, the beads will not come off the headpin if you make the notch bent enough. To wear, you might want to use clear fishhook stoppers so that the earrings don't come out of your ear.


See, I told you that was easy!


Shown worn. Don't use any super-heavy beads as these will throw the earrings off-balance. 


Make these in different bead combinations for every outfit!


All images and text copyright Allison Beth Cooling. Do not use my photos without crediting me, and if using this tutorial please link back!