Saturday, June 29, 2013

Woven Chain Bracelet Tutorial


The Emilio Pucci Pre Sp/Su 2014 collection is so cool, I had to make a tutorial based on it. 


For this tutorial, I tried to capture the elegance with detail as seen in the collection, as well as the color palette. I used chain as well as pearls from Prima Bead. Crystals and chain/metals is what is popular now, as seen in many designers' collections including Tom Binns.


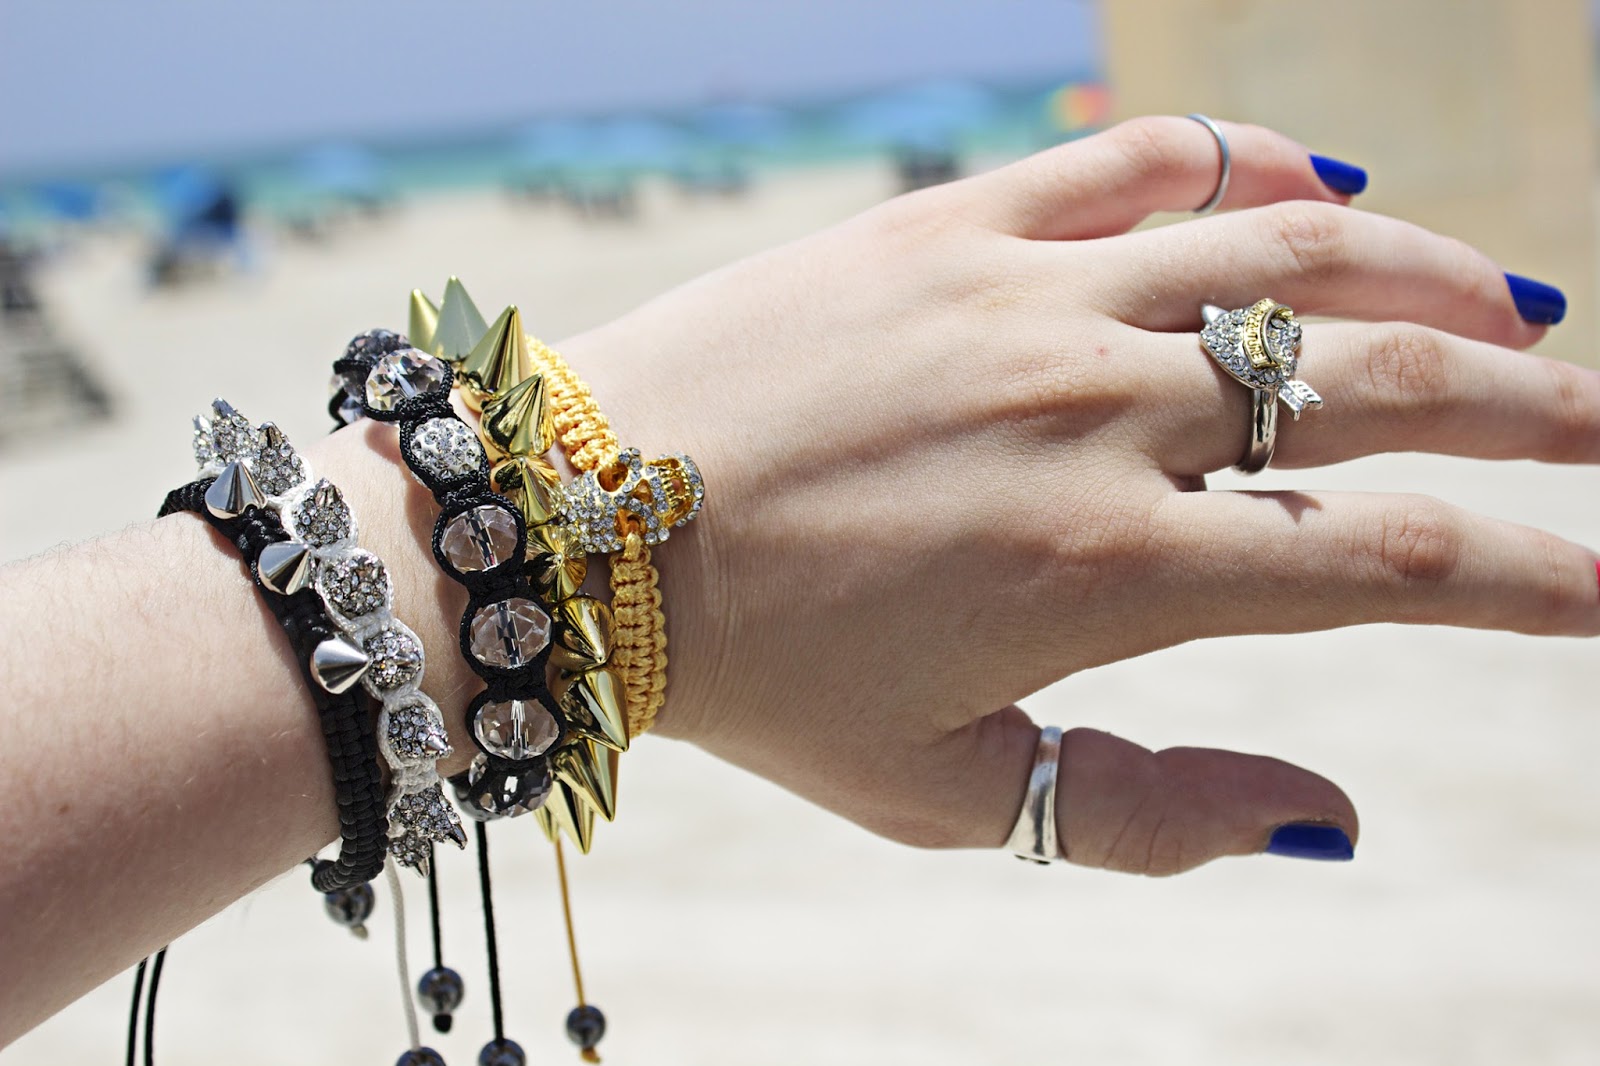
What's great about this bracelet is that it can be stacked with other bracelets to create impact! Also, it is much cheaper than anything bought in a store!


 Let's get started!


Step 1: Gather materials. Needed is fishing line (an unconventional way to string with because it is so strong), chunky chain, bead soup (a mix of crystals and pearls and/or metal beads), and a clasp with crimps. You will also need pliers.


Step 2: Take your fishing line and cut a long piece; I didn't exactly measure, mine was maybe 4 feet long. Fold this in half, and then make a Larks Head Knot on the end of the chain; make sure the chain is the length you want your bracelet. Crimp the knot onto the chain end, but don't pull the string super-tight; fit your jumpring for your clasp on through the knot and close the ring. 


Step 3: Thread on a small bead through both of the strings. Take one of the strings, and thread it under this link of chain (second pic) then, thread this same string back up through the next link on the chain (third pic). Both of your strings should be facing upward, as seen.


Step 4: Repeat the last step for every link, alternating crystals and pearls. For finishing, thread on a crimp, thread on the clasp, and thread the strings back through the crimp. Crimp shut and cut the extra fishing line.


You can use a magnetic clasp as well here, it would be easier to put on yourself!


Finished!


Make these with different color crystals or chain and layer them for a luxe look.


If you share/use/post this tutorial, please link back to me. It is much appreciated! Don't use my photos without crediting me please!


Sunday, June 23, 2013

Day 7: So Long SoBe and Free Cloud Background


Last day of Miami....


I'd figure I'd post some pics of the architecture!


South Beach has a cool art deco style that is definitely very inspirational for all types of artists alike!


I took about 300 pictures in one day!


Of course, I had to post some pics of my accessories as well. Here, I wear my Midi Ring  along with rings from Generation Bliss. The bracelets are: top, my own (tutorial may come soon), and last two from So Good Miami.


Ring (middle) from Juicy Couture, pinkie ring my Midi Ring, thumb, vintage, bracelets from So Good Miami, ASOS, and Ebay.


And just to say farewell, here is a free cloudscape; feel free to use in any digital art project you have! Image is 72 dpi for web use. Click to download.


Friday, June 21, 2013

Day 6: Quick Tropical Hair!


Having flowers in your hair is not just for hippies anymore.....
I've got a really simple tutorial here!


And, these are my most FAVORITE flower. Plumerias. I had never seen one in real life until now!


They just look oh-so-tropical!


I spotted pink plumeria flowers too!
But let's get started with my oh-so-easy tutorial for summer hair!
You could start off by prepping the hair with my Beach Spray....


It's as easy as this: braid a small section of your hair, and tie off with a hair elastic or as I used here, a Silly Band! If you did multiple braids with multiple color Silly Bandz, it would produce a neat rainbow effect! Don't use a thick hair tie, rubber bands work the best.


Take the stem of the flower (it should be about 1" long) and pass it through a loop of the Silly Band, the elastic will hold it tight!
That's about it. Use multiple flowers for a very hippie look!


Thursday, June 20, 2013

Day 5: Lincoln Road Mall PLUS Quick Photoshop Tutorial


 Lincoln Road Mall in SoBe goes on and on forever! Today, a shopping spree occurred, and I didn't even have time to walk the full length of the mall and visit all the stores. However, my favorite of them all.....


....I sure visited.


I thought it would be a good time for an easy Photshop tutorial, seeing as though I did not bring any jewelry making supplies with me on vacation. This tutorial is a really easy, less than 5 minute tutorial which can really help you become more familiar with Photoshop and what it can do. We will be creating the "Juicy" text image seen 3 pictures above this paragraph.
This is customizable, customize the text and image to create all different graphics!


Step 1: Open up your background image. Textures are good here, and we don't want white areas in the image because it will make the text somehwhat invisible. This image of gems I took while on my shopping spree.


Step 2: Click on the Type tool; the left-hand side of Photoshop in that vertical menu bar, the big "T' button. Type your font here. I used Juicy Couture's font. To make the font bigger to fill the screen, I use the direct selection tool (the first button in the left-hand menu bar, the first button with the black arrow) and hold shift while dragging a corner of the box out to enlarge the font.


Step 3: Double-click on the Background layer. Click the OK button. This will unlock this layer (background layers are always locked, meaning we can't move the layer at all).


Step 4: Drag the background layer, now called Layer 0, above the Text layer (in my case named Juicy) and then release the mouse. The text layer will disappear! But don't worry......


Step 5: Right click on Layer 0. Click on the "Create Clipping Mask" in the dropdown menu.


Your background image will now only be covering the text! Go to file, save as, and save as a JPEG (or standard image file). There you have it!


Like I said, this technique is limitless. Make your background image related to your text to keep the look cohesive!


Wednesday, June 19, 2013

Day 4: A Beach Animation and a Wallpaper!


Today, a beach animation!
Animations are so cool to make, especially to capture a certain mood. Here, I couldn't pass up the rainbow umbrella sitting idle on the beach!

Plus, a wallpaper. I loved this photo of the beach I took because of the simplicity. I mixed it with modern font but a vintage photo filter; summer should always last forever!
Free to download, just click the image below and set as your background!


Tuesday, June 18, 2013

Day 3: Photo Journaling and Photo Tips


Today was a day of sightseeing.


Of course that included some cool shades.


And palm trees, AGAIN.


Some glitz (here, rings from Generation Bliss) and of course, Chanel shoes.


And as always, coffee; here is a latte with soy milk!

Some tips for taking travel photography:
1. Focus on the small things. Instead of trying to get the WHOLE scene, focus on one item that's the most interesting. Your photos will be unique. Anyone can take a picture of a beach coastline. Try to find a unique spin in your image, maybe by tilting the horizon, or using bokeh (see tip 3)

2. Set the mood with the color. It's easy to use Photoshop to change colors; me changing the color on the coffee picture from the dull brown it was to pure black and white makes for a more sophisticated picture. Think about the mood you want to convey.

3. Bokeh images. Like the palm tree image above, I love bokeh photography. It really gives all your photos an artistic vibe, and makes them more interesting to look at. Some great tutorials are on the net, but I've found that they make the technique seem harder than it is. All you have to do is put your hand about a foot in front of your camera lens, press the shutter halfway down to focus (on a Canon, or focus however your camera does if other brand), and then point your camera at your subject; it should be blurry in the viewfinder. Take the picture! If it is too blurry, try to focus on something a couple feet away, say like a tree trunk or light post. Then find the subject and take the picture. The amount of blur will depend on how far you are away from your first focusing subject, then the real subject you take your image of. The best way to judge is to just practice!

4. Document specific things. Specific outfits, accessories, places, things that are unique to that place or your situation. I love posting a mix of what I am wearing, eating/drinking, and seeing to form a full snapshot of the time!

There you have it, some simple tips!


All photos copyright Allison Beth Cooling. DO NOT use these images without linking back or giving credit to me! 


Monday, June 17, 2013

Day 2: Simple Miami-cure!


I have for you a quick and easy Miami-cure! Get it, manicure from Miami?! For this I used only two colors of nail polish, plus clear coat, and nail gems.


This was inspired by palm trees; I obviously abstracted the "palm" part and used bright colors to compliment the beach! I finished it off with a stack of neon bracelets (the second from the top is my own creation, the tutorial might be coming...) and a midi ring from my tutorial here.
I'm giving you an easier way to do the tutorial by using graphics, instead of photos. It's easier to see!


Start with a blank nail. Paint two coats of a bright blue. Take a bright pink, and carefully paint three "palms" from the corner of your nail. If you have a thin nail brush or those nail polishes with the "art brush",  use these because it will make it easier. Finish off by adding a gem to where the palms meet, using the clear coat as "glue". Do not paint over the gem, or it will lose sparkle!


Stacks of neon bracelets are huge this summer, and compliment any manicure! The ones seen here are from Claire's (the infinity), Ebay (the top and bottom bracelet). You can find these anywhere these days, or look at my tutorial here for macrame bracelets, or here for cool recycled braided bracelets. Make a bunch and enjoy!