Sunday, November 17, 2013

Mini Monogram Bracelets- "Handmade Holiday" Project 003


These are my third installment in my "Handmade Holiday" initiative. These are just so dainty and cute! My Mini Monogram Bracelets are perfect for giving to your BFFs around the holidays! These are so simple to make, and cost a minimal amount of money to get them going. Plus, no hard techniques are used in the tutorial, and they come together in five minutes! Seriously, I timed myself. The longest time will be waiting for the paint on the alphabet beads to dry!


The mix between the cute alphabet beads and more modern open circle bead frames, with the addition of a small crystal dangle all make for a customized accessory, great for wearing every day! I chose to use gunmetal chain/findings here because it contrasts the white alphabet beads and is a little more modern than a gold would have been! If you or your BFF (or whoever else you are making this for) doesn't fancy gunmetal, you can definitely change out the metal color!


I used Crystazzi crystals here for the gemstone/birthstone drops; if you don't know what gemstones go with each month, look here. The addition of this birthstone drop adds both sparkle and shine, and makes this a truly unique piece!
I tool the same color paint of the gemstone and used it to paint the alphabet bead's letter. You can use either nailpolish here or acrylic metallic paint. Adding this bit of color ties the beads together!


To style these, pair them with a casual oversize tee, baggy boyfriend jeans and cheetah sneaks. For warmth, add an oversize bright scarf. This look is great for running errands or meeting up with your friends!
*Outfit Credits: jeans and scarf from Generation Bliss, sneakers from Keds.*


These take less than 5 minutes apiece to make, and they are insanely easy to put together. The open circle beads I bought are from Cousin, and they come on a pack with open square beads as well. You can use the square beads (which fit 2 alphabet beads inside) to make bracelets that say BF for best friends if you want as well! Add a small heart charm dangle, and you've got stylish accessories for you and your friends.The possibilities are endless.
Are we ready to go?!


Step 1: Gather materials. Needed are white alphabet beads (mine from Cousin), Open circle beads (mine from Cousin), gunmetal headpins, clasps and chain, and then metallic acrylic paint or nail polish.
Have on hand wire cutters and round nose pliers.
These materials can be found at Michaels, JoAnn, AC Moore stores or even Walmart!


Step 2: Decide what initial and what birthstone you will need. For this bracelet, I'm doing a topaz gemstone with an A, so I'm gonna need gold paint to match the topaz.
Take your gold paint and paint a small amount into the indentation of the letter, and then gently wipe off the paint not in the indentation. You can use a small rag or just your finger. The gold should be left in the A. Repeat on the other side. Let the bead dry for a couple minutes, then repeat again so that the black is completely covered by gold.


Step 3: Take your headpin and cut off the metal end; create a small loop, and attach to a piece of chain that is the length of your wrist. Thread through the hole on the frame bead, then through the alphabet bead, then through the other side.


Step 4: Bend the wire at a right angle, then create a finishing loop. Attach the other side of your chain to this loop.


Step 5: Find the center link of your chain, and undo it; add a jumpring to this link, then a jumpring and clasp to the other side of your chain. To finish, add your gemstone crystal to a headpin, then cut, loop and attach to the loop on the side of the frame.  


Cute and unique.


Elegant too. These mix playful and chic! I'm sure all of your friends will want some!


All images copyright Allison Beth Cooling. Do not use/post this tutorial or pics without crediting me!


Thursday, November 14, 2013

Where do I buy my crafty materials??


Out at Michaels, searching for my next bunch of materials for my "Handmade Holiday" tutorials. 
Searching through all the Cousin materials; some of my favorites are the Elegance Metals, Trinkettes charms and of course the sparkly Crystazzi crystals. 
My next tutorial will be a boho-style necklace, perfect for all the cool chicks on your Christmas list! 
Stay tuned.....

Sunday, November 10, 2013

Jubilee Bracelets-- "Handmade Holiday Project 002"


My second installment in my "Handmade Holiday" initiative; my Jubilee Bracelets!
These bracelets just sparkle and shine, and look like candies when worn. With minimal materials but maximum wow factor, these little ditties can be whipped up quick, and are great to give as small gifts for the holidays.


Just like my Arizona Sparkle earrings, these require no advanced skills to make, and you don't have to shell out a lot of money. What's great about these is that with the addition of chunky crystals and slick metal chain, they only look expensive! There is no need for a clasp on this, the stretchy cord gives enough to fit over your hand.


If you want to make these bracelets for yourself (yes, you do), these are great to add to any outfit for a bit of sparkle and shine. Pair a basic black maxi dress with a beaded, boho cardigan and comfy moccasins. Finish off with a simple zip-top purse and loads of stacking bracelets, including the Jubilee bracelets! So cool, with a bit of gypsy-meets-evening look, great for running around shopping in the city!

*Outfit Credits* Dress by ISSA, sweater by Hoss Intropia, shoes by Minnetonka, bag by Fossil.


Don't they just look like a party?!
I got all of my materials at Michaels, and these are all Cousin products. I have attached a printable shopping list under step 1 for easy shopping; all of these Cousin materials can be bought at a Michaels, JoAnn Fabrics, even Walmart and AC Moore craft stores!


I layered mine with mixed metal bracelets and bangles, even throwing in my Delicate Crystal Tassel Bracelet for good measure. Add a statement ring and you're all set!
Are we ready to go?


Step 1: Gather materials. Needed are roundnose pliers and cutters, gold/antique gold cable chain, 6 or 8mm rondelle crystals, clear stretch cord, crimps and 4mm gold crimp covers. 


Step 2: Measure your wrist (if making this as gifts, the average wrist size is 7.5"). Double that amount, and take off 2". Cut a piece of chain this long. Cut another piece of chain this long. With about 4" of stretch cord, string on a crimp, then through the last link of each piece of chain, then back through the crimp and pull tight. Crimp the bead so that it locks the cord in place. Cut off the excess stretch cord, flush to the crimp.Take a crimp cover and place over your crimp, and close it by squeezing your pliers on it. The ends should meet and be flush and clean.


Step 3: String on five crystals to the stretch cord, then another crimp bead. String through the other two last links of chain, then back through the crimp bead, and pull the cord tight. Crimp the bead, cut off excess string, and add the gold crimp cover. Crimp shut.
You are finished!


What's great about these is that you can use different colored chain, and mix and match crystals to create truly unique pieces. I love mixing metals, because the look becomes very boho-chic!


If you really wanted a holiday look, use green and red crystals with silver chain. These are great to wear any time of the year, and I'm sure anyone would love to get these as a gift! The chunky crystals definitely remind me of candies, and the mix of rose gold and shiny gold chain, along with the coated crystals, add just the right touch to any holiday party (or everyday) look!
Enjoy and be merry!


If you share/use/post this tutorial, you must link back to me please. All photos  
copyright Allison Beth Cooling. Do not use photos without crediting me!


Monday, November 4, 2013

Arizona Sparkle Earrings-- "Handmade Holidays Project 001"


The first installment in my "Handmade Holiday" initiative; my Arizona Sparkle earrings! These earrings are were inspired the colors of the west (bright turquoise and coppery crystals) but made to fit a very chic cocktail party or soirée-type event. With that said, I am sure that nobody would feel blue if they received a pair of these as a gift!


I am thinking these would be great for teachers, counselors, or any classy lady. This is a classic design that is timeless, however the large kidney earwire addition adds a contemporary vibe!


The mix of the matte gemstone and shiny, bright crystals make for a multidimensional piece!
This design would work in any color combination, really. Just make sure your colors contrast; stick with red+green, blue+orange or yellow+purple (this is a mix of a blue hue (turquoise) and orange (the brown crystals)). Red and green would definitely give a holiday vibe!


If you want to make these for yourself (yes, you do), they'd add a great pop of color and sparkle to a sophisticated holiday party outfit. Pair the earrings with a sleek black midi dress, detailed black booties and silver python clutch. Fall and winter is all about animal print! This would be a great and subtle way to work the trend.

*Outfit Credits* Dress and clutch by Generation Bliss, shoes by Giuseppe Zanotti


The materials I used for this can be bought at JoAnn Fabrics or Michaels. I bought these materials at Michaels. They are all from Cousin; I have attached a shopping list you can print up for easy shopping. 


Step 1: Gather materials. Needed are roundnose pliers, wire cutters, 5mm crystal rondelles, turquoise gemstone beads (about 1" long), large silver kidney ear wires, and silver head pins.
To download and print a shopping list of materials, click here!
If you don't live near a Michaels or JoAnn, Cousin also sells at AC Moore stores and now at Walmart. You can find great supplies anywhere!


Step 2: String a turquoise bead on a silver headpin; create a top loop with your pliers, wrapping the extra wire around the bottom of the loop about two times; cut the excess flush with your wire cutters. Repeat with another bead, for your other earring.


Step 3: Add six rondelles on individual headpins. Bend the wire at a 90 degree angle right at the top of the bead, to catch the bead on the wire. Clip the excess wire off about 1/4" from the bend. Create loops with all the wire, but before closing the loops, add them to the turquoise bead you made in the last step. Add all six of these beads to the same loop.


Step 4: To finish, simply string on the large kidney ear wire to this same top loop of the turquoise bead. String it all the way to the notch in the earwire; this is where it will sit!
You are finished!


Package these up in little organza bags, tied with ribbon. A super cute gift!
You can make a lot of these little goodies in little time. 
These would be great even for a birthday gift, it doesn't have to be just for the holidays!


If you share/use/post this tutorial, you must link back to me please. All photos  
copyright Allison Beth Cooling. Do not use photos without crediting me!


Saturday, November 2, 2013

"Handmade Holidays" Kickoff!


The holiday season is upon us! For the whole month of November, I will be featuring tutorials that take 30 minutes or less. Each tutorial will focus on a handmade holiday gift tutorial; from easy earrings, hair accessories and gift decorations to holiday goodies and more, it's time to take back the holidays, handmade style! 
Stay tuned for weekly tutorials and more. 

Tuesday, October 29, 2013

Metro Pearls Bracelets


These bracelets are simply chic; the champagne color of the wire and gold rings, plus the matte shine of the pearls makes for a very "cocktail hour" type of bracelet! The contrast between the classic pearls and more industrial look of the exposed wire and metal rings makes for a truly unique piece of wrist candy!


All of my materials came from Cousin Corporation; the beading wire and jumprings I used are Beadalon Brand, which are now sold by Cousin! These materials are great and high quality, and are very versatile. In this tutorial, I use jumprings as beads instead of the traditional chainmaille application. 


I named them "Metro Pearls Bracelets" because they feel much more metropolitan to me than traditional. Plus, the channel crystal bead in the center is a more contemporary take on the classic rhinestone! 
Let's get started!


Step 1: Gather materials. Needed are pliers, a clasp, crystal spacers (mine from Cousin), Beadalon Champagne Stringing Wire (mine from Cousin), 6mm or 8mm pearls (mine from Cousin), and Beadalon Artistic Wire jump rings (mine from Cousin) in gold or brass.
These jumprings are great because they are non-tarnish! 


First off, make sure you close all the jumprings; in the pack, they aren't fully closed. Simply close with your pliers by twisting, NOT pulling, so that the ends meet up together.

Step 2: Measure your wrist, now add 2". Now, double that length and cut your Beadalon wire to that length. Fold your wire in half and string on your clasp. String on your crimp through both wires and crimp shut right against the clasp. Now, string on a pearl on each wires, then a jumpring through both wires, creating a group. Keep up with this technique until you reach the center of your bracelet. For the center motif, string on three jumprings through both wires, then your crystal spacer, then three more rings. Then, continue your pattern until your end. To end, simply string on a crimp through both wires, then a jumpring; string back through the crimp, pull tight, and crimp. Cut with your pliers flush so the wire doesn't stick out. 


These are addicting to make! They are so totally fast, and there are no hard techniques involved. They look ultra chic because of the mix of classy pearls and contemporary metal wire, and would be great to give as gifts for any occasion. 


These are great stacking bracelets, because they sit together nicely and can be made with different size pearls. I used 6mm pearls for the champagne and mocha colored bracelets, and 8mm for the dusty grey bracelet.


If you share/use/post this tutorial, you must link back to me please. All photos  
copyright Allison Beth Cooling. Do not use photos without crediting me!


Thursday, October 24, 2013

Behind the Chandelier Earrings


These Perriwinkle Frost Chandeliers by Phillipa Kunisch at Anthropologie are so dainty and elegant. I love the use of only wire and crystal to make such an intricate earring! These inspired me to make a version of my own.


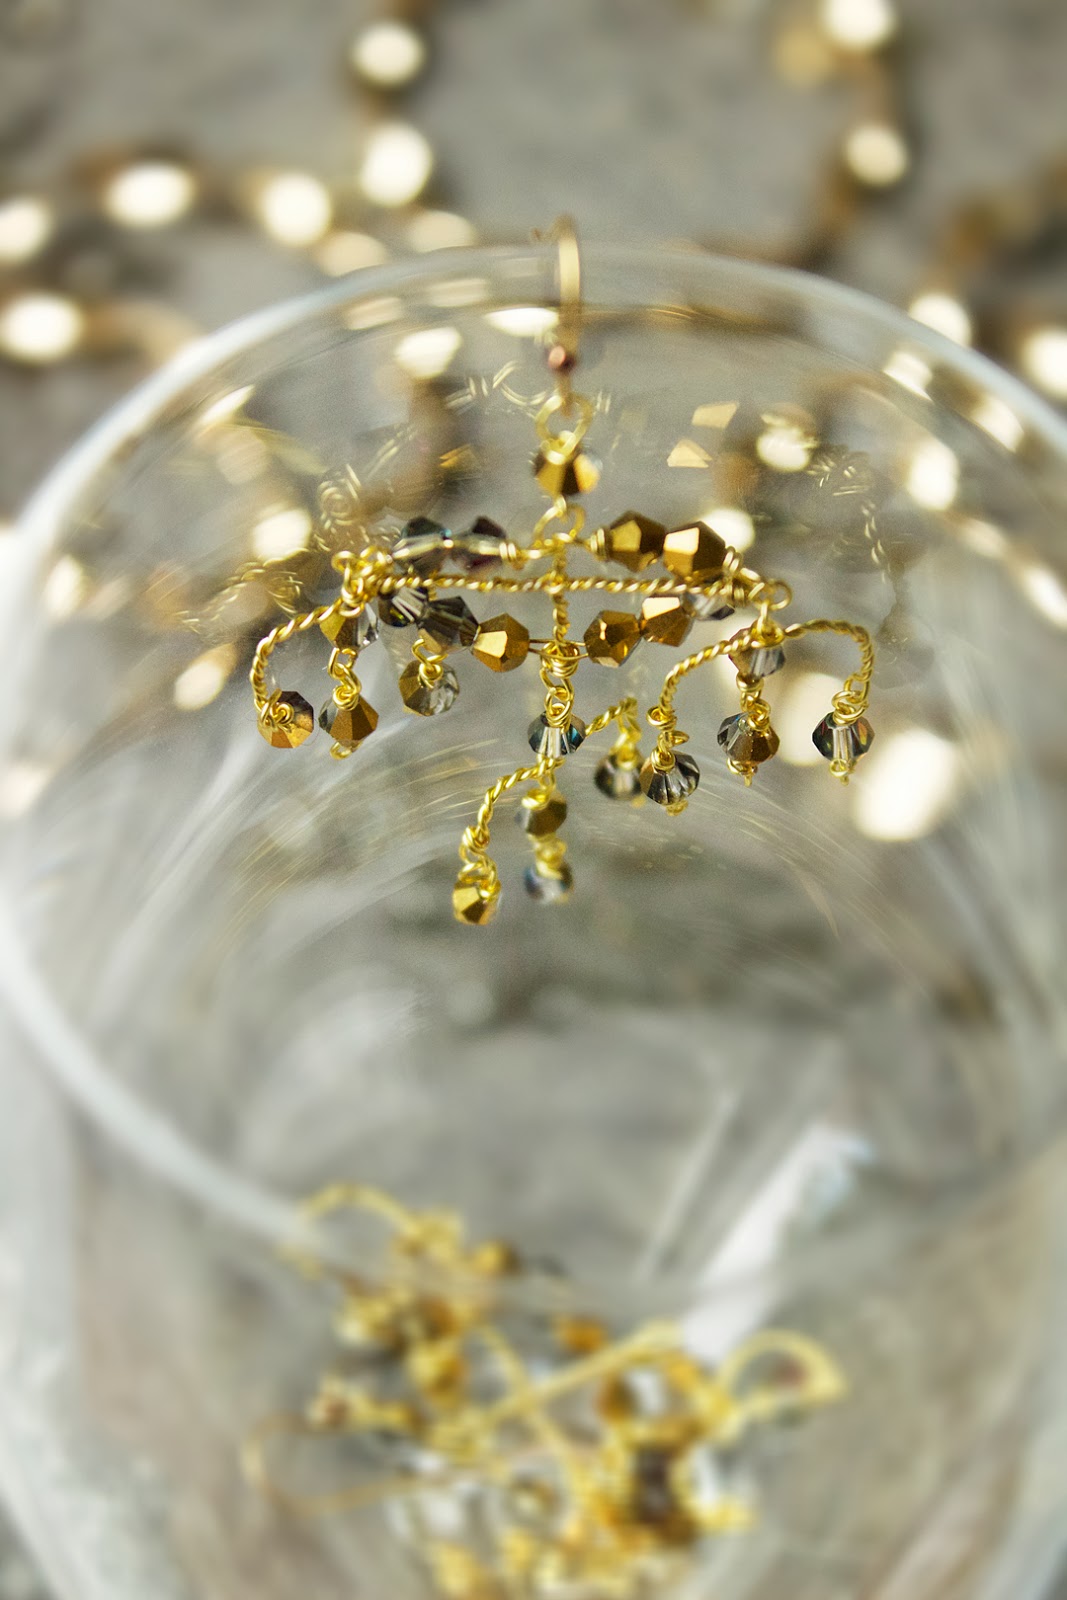
I really love gold, and these two-tone crystals by Cousin were the perfect choice to use because of their gilded look! That paired with the thin, textured twisting of the wire and dangles that flow in the air make for a pair of sure statement earrings! For my DIY version, I used smaller crystals, but more of them, to create even more sparkle.


People will have no idea that you made these yourself, trust me! They will be great for wearing to upcoming holiday parties or any other special events.


Did I mention that they are super lightweight?? Seriously, usually chandeliers are lobe-stretching heavy, but these are light and airy, which is good for everyone!
Let's get started.


Step 1: Gather materials. All you need are pliers, gold earwires, 24g gold wire (mine from Cousin) and 4mm or 5mm crystals (mine from Cousin).


Step 2: Make wrapped links with two of your crystals, cutting the wire flush to finish. Cutting the wire flush on each link will be key here, to keep a clean look to your earrings! Add the top loop of each link to the earwire.


Step 3: Make two more links, but this time with two crystals per link. Cut about 6" of wire, string on the links you just made AND the bottom loop of the link attached to the ear wire, and group all these links together by holding the joint with your roundnose pliers and twisting the wire against itself with your other hand. It should look like this (bottom pic).


Step 4: Continue wrapping the wire until it is about 2cm long, and finish with a wrapped loop.
I repeated the last step and this step for the other earring.


Step 5: To make the cross-section, add on another 6" piece of wire on the open end of one of the 2-bead links. Fold in half and then start twisting the wire on itself, like in step 3; when the wrap is about .5" long, insert the vertical twisted wire inbetween the wires, and twist tightly to hold in place; twist another .5" until you reach the other side of the earring; finish off this horizontal piece by ending with a loop, catching the 2-crystal link's open end into the loop. It should look like this (last picture).


Step 6: Add two 1-bead links to either side of the horizontal crossbar. To add the chandeliers, cut about a 4" piece of wire, and fold in half. At the half, make a small loop and then twist the wire upon itself just like how you have been doing. When you reach a little over 1cm of a twist, insert the top loop of the 1-bead link you added, and twist tightly to secure like you did with the vertical crossbar in the last step. Finish off with another 1cm of wrapping, then end with a loop. Repeat with the other side of the earring. Add 1-bead links to the empty loops  on the chandeliers (4 in total).


Step 7: Add a final chandelier to the bottom loop of the central bead link, then add 1-bead links to the empty ends of the chandelier. To add the crystal finishes in the center, cut about a 5" piece of wire, and fold in half. Thread on to the side of the horizontal crossbar, right at the halfway mark, and twist to secure. Add three crystals, then thread through the vertical crossbar, then another 3 crystals. Wrap at the other side of the horizontal crossbar to secure, and cut flush. The arrows show where to start the wrap, and the thread-between of the vertical crossbar!


To finalize, add one more crystal drop at the center chandelier. 


Even though these earrings look expensive, they are so cheap to make! The materials cost less than $10 all together, while the Anthropologie version is about $250. 


You can make these in all colors of crystals; try using silver wire if you like silver, or maybe a copper wire would look cool with some turquoise-colored crystals, for a western-inspired look?! The possibilities are endless!


If you share/use/post this tutorial, you must link back to me please. All Photos (except Anthropologie one) 
copyright Allison Beth Cooling. Do not use photos without crediting me!