Showing posts with label tassel. Show all posts

Tuesday, June 3, 2014

Crystal Waterfall Drops


Bright spring sparkles!


It's a daintier look, inspired by my Candy Shoppe Amulet necklaces. I am digging the looped wire links thing. These earrings are dripping with crystals, just like a waterfall.


I've collected a bunch of Cousin brand crystals, which I love for their uniformity and versatility. Cousin Jewelry Basics crystals I would recommend to anyone, especially because they are a LOT cheaper than paying for Swarovski. They come in a rainbow of colors and sizes. You can find them at all craft stores!


I've paired those crystals (in various shapes: rondelles, rounds, bicones) with Cousin rhinestone pave beads and rose gold fishhook findings from Cousin's Elegance Metals line. The Elegance Metals collection is great because you get that fine jewelry quality without paying full price! You can get Platinum, Stainless Steel, Gold, Rose Gold and other fine metal plated pieces that add a higher-end feel to any piece. Plus, they are great for people who may be sensitive to metals.


I've used a complimentary color scheme here; pinks and teals make each other pop, and the champagne metallic thread adds that luxe touch.


You can get these Cousin materials at Primabead.com, Michaels, JoAnn, Walmart and AC Moore stores.
Let's get started!


Step 1: Gather materials. Needed are:
-Roundnose pliers and wire cutters
-Gold gauge 24 wire (mine from Cousin)
-Various size crystals. I used Cousin Jewelry Basics 8mm crystals,  smaller bacons, 6mm rounds, and rondelles. Pick crystals that suite your tastes!
-Rhinestone beads, 8mm or 6mm. Mine are from Cousin again.
-Metallic embroidery floss


Get out your collection of beads, and start picking your favorites…


Put yours into a 3-stranded arrangement that you like. You can see my arrangement in the top picture. 
Start by making links, much like in my Candy Shoppe Amulet Necklaces out of all the beads EXCEPT  the top bead in each strand. To connect the top bead, first start by linking one end of your wire in the hole on the fishhook. Add your bead, and connect the other side to the second bead in that strand, to connect the two pieces.


Your strands should be coming together. Keep working until all the beads are used and the strands are filled in.


To make the tassel, simply wind the floss around your fingers about 6 times. Carefully tie a small piece of thread at the top, and wrap with wire, cut the ends. Add a jumpring at top.


Attach this jumpring to the last loop of the middle strand. Finish by adding small crystals to the other two strands. 


Make these in any color you want! I went with a more vintage-inspired color palette and mixed metals with rose gold, champagne and regular gold.


These are a bit long if you prefer short earrings, so make as many or as little links as you want to play with the length. 


All images and instructions copyright Allison Beth Cooling. DO NOT post or use these images or text without linking back to me.



Thursday, March 27, 2014

Handmade Crystal Tassels


Finally, another tutorial!


I've made luxe crystal tassels perfect for adding to anything such as curtains/window treatments, table runners, doorknobs, or anyplace else where you want a bit more sparkle!


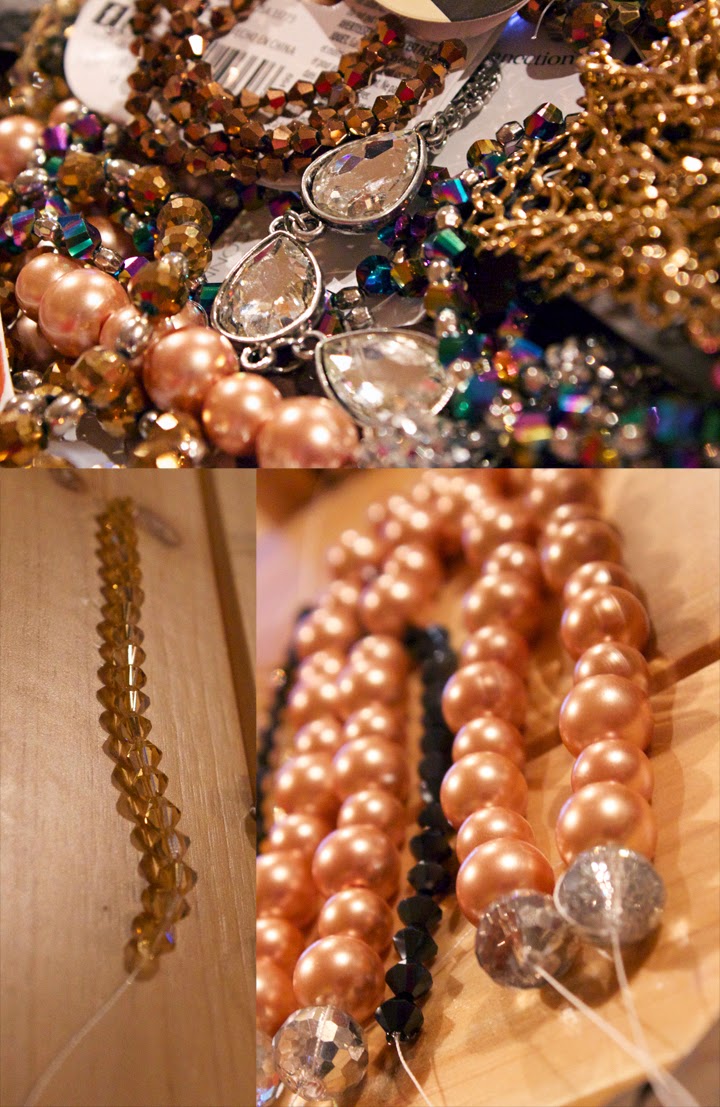
I've collected a bunch of different beads in different mediums; glass beads, crystals, pearls, chain, and some focal pendants. All the materials here I am using are from Cousin Corporation, and can be found at JoAnn fabrics, Michael's, AC Moore stores and Walmart.


I made these tassels for my table at the Illinois Institute of Art-Chicago portfolio show today. Yes, I am officially graduated and have a BFA in Graphic Design. I used them on the four corners of my table setup to add some glitz, glamour and fun to my station! More pics from the show follow the tutorial below.


These did take a little time to make, so be patient. These are great especially for holidays or special occasions. They add such a unique handmade touch!
This tutorial is a bit ambiguous, just because there can be so much differentiation in size and style of your tassels, I didn't put exact measurements. Just have fun and use your own judgement!


Step 1: Gather materials. I used a bunch of beads (pearls, crystals, glass beads) and chain. There is no certain amount of beads you need; I just threw together beads that complimented each other! 
Sticking to a specific color palette will help too. 
Start stringing strands of beads on beading thread (I used two strands for strength). To end, simply string back through the last bead to catch it, add a dab of glue and cut flush. MAKE SURE there is at least 3" of empty string at the top, we will be using this later. 


Continue stringing, making sure the same amount of beads are on each strand so your tassels are the same size. Make strands of pearls, crystals, glass beads and whatever other beads suit your fancy.
I used Cousin crystal drop beads, attached them to a jumpring and chain for a focal drop piece.


Gather up all the strands you want in the tassel. Then, string them all through a large-hole crystal (or other bead) and tie a knot to collect them all. Then, I poked a headpin up through that large-hole bead so that I could use it to hang the tassel with.


Finally, I cut the excess string off all the strands, and finished with a bead cap and pearl. I created a round of beads to add at the top of the tassel as well; simply string on the required amount of beads and string back through the first bead, it should pull into a round.

There is no specific formula to make these; it all depends on the length, amount of beads, kind of beads, and number of strands that are in your tassels.


Here are my finished tassels. I made them with the flexible wire top so that you can hook them places, or even wrap them onto something. Below are some shots of my portfolio show tablescape at the Hard Rock Hotel in Chicago…...


I made two flower arrangements for a bit of freshness. They had black tablecloths on all our tables but I amped mine up with a caramel-color satin overlay, where I added my tassels on the corners.


My business cards were in a silver-flaked shell dish and filled with acrylic diamonds. I had some caramel candy in there too! Of course the letterpresses cards were decked out with metallic foil and I added a Swarovski crystal flatback to the center.


I added rock details across the table with sliced agate, amethyst, quartz and carnelian to add some of my "metaphysical" vibes. Maybe the audience there though I was a gypsy or something. The other kids had their process books, mock-ups of final reports and such, and I had rocks, gems, crystals and flowers. And was wearing plenty of handmade jewelry, of course. Oh well.


I'm saving these tassels to use again. They've got all my favorite neutral colors but pack the glam factor with sparkle and shine!


All photos copyright Allison Beth Cooling. Do not post without crediting me!


Thursday, October 20, 2011

Easy-Peasy Tutorial; Topshop-style Necklace!


The Topshop Necklace
Topshop jewelry is found everywhere; celebrities, fashion magazines and the like sport their designs. When I found this necklace on their site, I knew that this would be an easy tutorial to show you guys. It literally takes less than 10 minutes to make this necklace; why not fool everyone into thinking you bought the real thing?!
Plus, it's getting close to Halloween. I thought the skull theme was very appropriate here!
My tutorial's necklace.
Oh, and by the way, you can probably make this with everything you already have on hand!
Let's go!
Step :; Gather materials. Needed are a necklace chain (the Topshop necklace uses antique gold metals; I had a silver chain and charm on hand, so that's what I used!), a large jump ring, a small jump ring, pliers, embroidery floss, a skull charm (you can get these basically anywhere online or at a hobby store), a fire-polished Czech glass bead (if you don't have one, use a similar-colored cut glass bead), and a head pin.
Step 2: Thread the glass bead onto the head pin. Attach to chain, loop and close. Then, attach your skull charm to the chain (with a jump ring) and close the ring. Both charms should hang from the chain.
Step 3: Make the tassel. Cut about 7" of three different colored embroidery flosses (I used my favorite colors, you don't have to match the real Topshop colors if you don't want!), thread all onto the large jump ring, and overhand knot to secure to the ring.
Step 4: Thread the large jump ring with tassel onto the chain, to the right of the skull. Trim your tassel to hang just below the jaw of the skull.
FINISHED. Told you it was easy, right!
Go out and fool everyone with your savvy jewelry-making skills!
Your finished necklace. Could fool anyone, no?!


If you share/use/post this tutorial, please link back to me. It is much appreciated!