Sunday, June 29, 2014

Christmas in July- Cousin 'Tis the Season Part 1


It's holiday time…..


Wha-wha-what?!! It's almost July, which means it's time for a little "Christmas in July" cheer. I've got a roundup of 5 projects I've created with a sampling of the NEW Cousin Tis the Season 2014 line. This picture above IS NOT from the new 2014 collection; I'm just totally forgot to take pictures when I had the products, silly me. The new line is going to be available at Cousin.com and craft stores like Michael's and JoAnn. Get ready for all-new packaging and products that will totally have you inspired to get crafting. From bead strands, charms and bells to pendants and more, check your local craft store starting July 1st for the new lineup.

I've got project #1 on this post. During the week, I'll post the others, so check back often.
___________________________

Project #1: "All Wrapped Up" Phone Cases

-You can really use any of the Tis the Season products, but I'll just show you what I used-

-Materials:
-Blank Phone Case
-Wrapping paper
-ModPodge, nail polish, clear varnish
-Paintbrushes
-Cousin 'Tis the Season: 
(Red Case) Gold Snowflake/Tree Charm pack, Button Tree charm pack.
(Green Case) Metal 3 Charm pack
-White Ribbon
-E6000 Glue


Directions: Simply decide on a good arrangement for your case. Start by cutting the proper size piece of wrapping paper and adhering it to the case with ModPodge (I roughed the surface of the case up a bit with fine sandpaper to help it adhere better). Make sure to rub gently to make sure all the bubbles get out. For the red case, I then sealed the piece of wrapping paper by painting over with clear gloss glaze. I took apart the tree button Cousin pack and glued all the buttons with E-6000 glue. Then, I added gold glitter nail polish around the buttons. I clipped the charm top off the big gold tree and glued it down again. Finally, I glued the star bead from the button pack to the top of the tree.
For the green case, I simply added a whole background of wrapping paper, sealing and then gluing the charm and one white button from the button tree pack. I finished by making small ribbon bows and gluing them to the top of each "ornament".


The possibilities here are endless; if you'd rather not do a full-Christmas theme, pick any holiday and run with it. Also, any size phone case will work; try your iPod case too!


Copyright Allison Beth Cooling- do not post/use tutorial or pictures without linking back.


Sunday, June 15, 2014

La Boutique Chic- Vase Necklaces


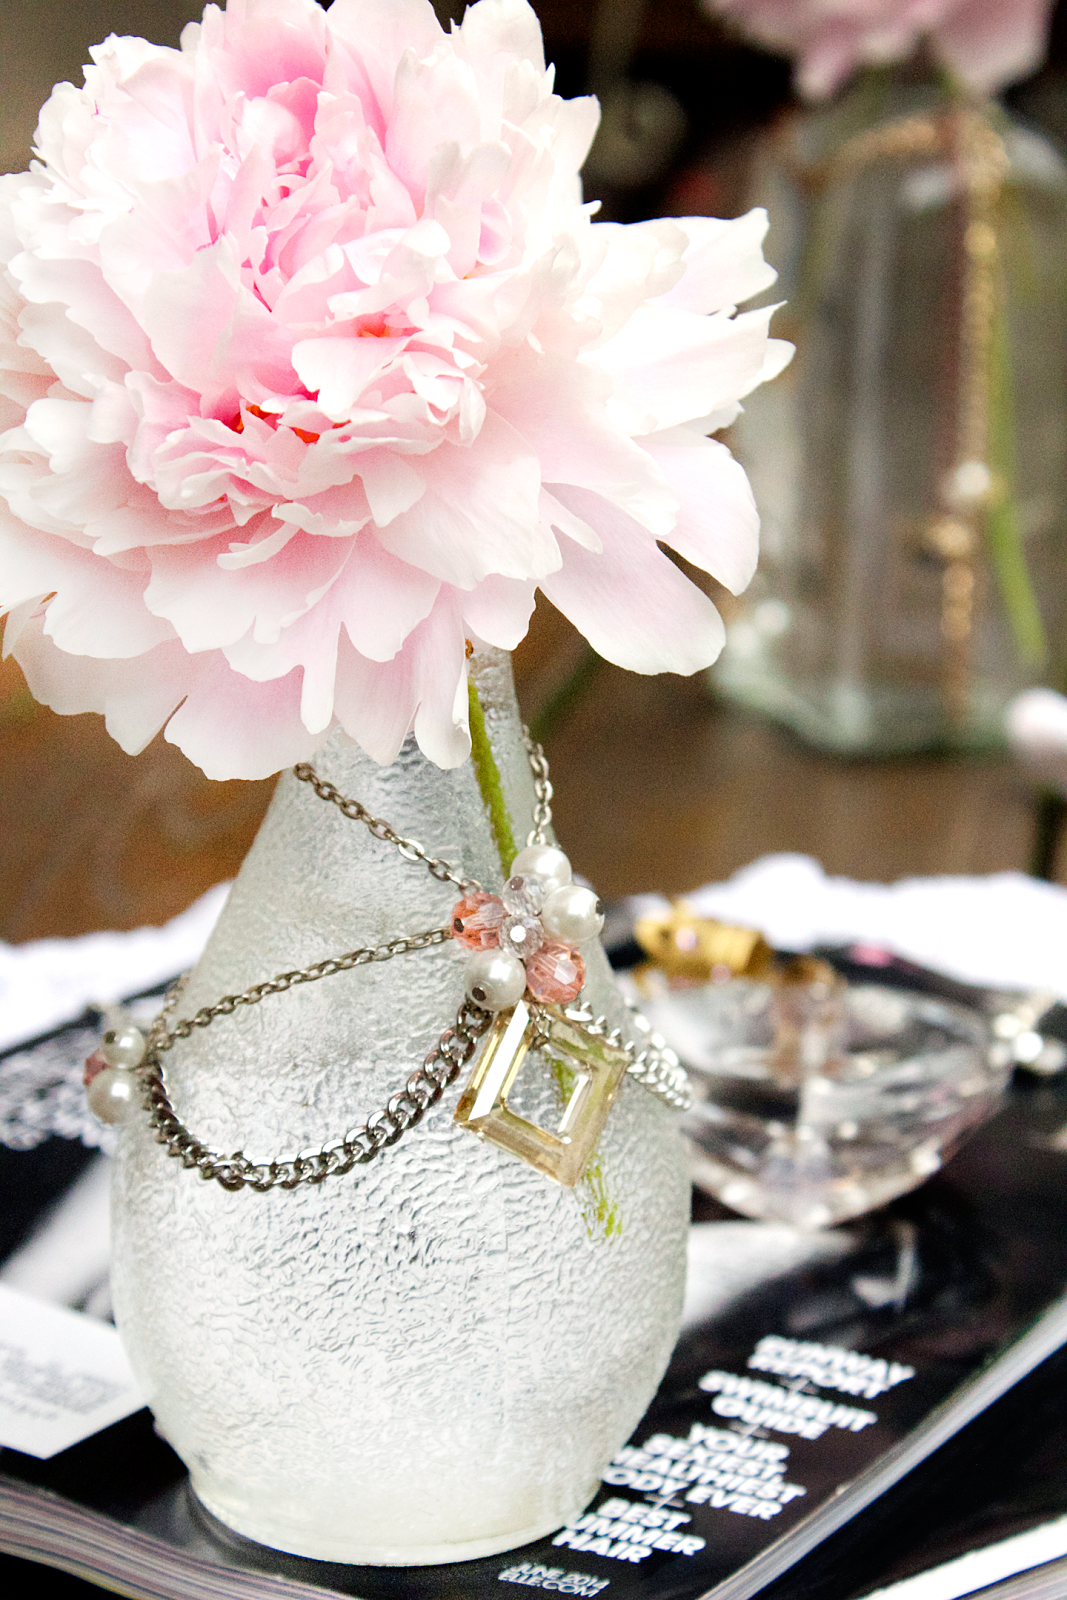
Fresh flowers and sparkly adornments…..what could be better??!!


Peonies are in full bloom, which inspired me to take ordinary glass vases and jazz them up with a bit of Cousin brand crystals and chains. 


What's great about these vase "necklaces" is that you can customize them to fit a special occasion (like a wedding or shower) or color scheme. I went with neutrals and blush tones to match the peonies. I can see these totally working in wedding colors or even red, white and blue for upcoming Fourth of July. Pale pinks or baby blues for showers would provide a delicate touch to any tablescape. Decorating with  these at parties is simple too; make these ahead of time, and simply just place on your vases for an instant upgrade!


There really are no specific rules here, as the amount and configuration of chain and beads depend on your vases and the look you are going for. I'll explain what I did so you can see the steps. These are really easy to make actually. Experiment with different styles and types of beads!


I'm featuring these Cousin rhinestone beads for the bigger vase, and Cousin pink pearls  with silver chain for the smaller vase. Also, it's a great way to use up pendant beads that have been laying around. Or, if you have a lot of charms, go with an eclectic theme and mix them with crystals for a funky look!


Step 1: Gather materials. Needed are glass vases, pliers, and an assortment of beads and chain.


I used a mix of Cousin brand chain in various styles. I also used Cousin focal crystal drop pendants and Swarovski pendants. I also used Cousin Jewelry Basic crystals and pearls.


Step 2: Depending on the size of your glass, use your chain to create a "necklace". I used the smallest silver chain, and added the Swarovski pendant at the bottom. I attached a 6" piece of chain to the top of a square Swarovski pendant (adding the rhinestone bead on top at first, but I reconfigured and removed it for the final piece). Then I took larger chain and created two side drops, about 7" for each drop. Play around with your placement of chain to create something that fits the shape of your vase! There really are no rules here. Just make sure you have that initial  "necklace" and every other piece of chain is attached to this one so it stays together. I attached a 5" swag of chain with jump rings to the initial necklace, and used headpins to make crystal and pearl drops on the ends of the free chain.
Notice that the first picture is different from what I ended up with; I played with various styles until I came up with the last one which I liked the most!


For another vase I started off with a necklace again, adding chain "swags" and connecting them with jumprings and charm drops. 


It really is that easy! No glue, waiting, advanced techniques or the like.


These make for a totally glam table setting. You can even make these to put on vases all around your house. If you are a sparkle lover like me, you totally need one in every room. These bring that "elegance" factor. They actually remind me of a sort of modern "French Country" type look-- no, a French Country meets Luxe Boutique look. Any decorating at my house needs to include the glitz and diamonds, ok?!! Ring here (right picture) from Generation Bliss. These actually ended up matching my Harper's Bazaar and Elle magazines perfectly. Go figure.


Flowers+crystals+perfume+jewelry+fashion magazines = HELL YES.
Enough said.


All photos copyright Allison Beth Cooling. Do not post/use without linking back to me and crediting me!

Saturday, June 7, 2014

Easy "Red Hot" Manicure


I did a quick and easy manicure on my friend Christie using Born Pretty Store's water decals.


All there is to it is one coat of polish (a bright Cherry Red here), Born Pretty's silver heart water decals (similar here) and Born Pretty's silver nail studs.


Add a large decal to the thumb, following with a small stud in the center of the heart.


Add an accent decal to the ring finger. Finish all with top coat!
For more info on how to use water decals, visit my Royal Teal Nails tutorial.
Use all different color schemes,  or even paint the nails with the decals on them a different color than the rest of your hand. 
Seriously, it takes less than 10 minutes. Great for last-minute occasions!!

All photos copyright Allison Beth Cooling.


Wednesday, June 4, 2014

S/S 2014 Men's Jewelry Collection


I've had some fun with this collection!


I was inspired by these little character beads  to make a fun but still "manly" group of macrame stacking bracelets. A mixup of other materials adds to the collection. 


From handmade Peruvian ceramic beads, African bone, hand-carved wood, dyed leather, neon knotting cord, Czech glass and more, I've combined them all to create a bold neo-bohemian look.


Select materials here were from both Cousin Corporation and Goody Beads.
I offset the knotted bracelets with rosary-style long necklaces, including Cousin spike pendants for an edgy look. 


The stackable nature begs for attention. Character beads like a hula girl, baby shark, gnome, cute monkey, Mexican sugar skulls and more add that weird, quirky, fun vibe.


For the gothic look, metal skulls are offset by a bright neon pop!


All items in this collection are sold at Generation Bliss boutique. If you would like to order one of your own, visit Generation Bliss or email qlcreations@yahoo.com!


All photos copyright Allison Beth Cooling. DO NOT use photos without permission.


Tuesday, June 3, 2014

Crystal Waterfall Drops


Bright spring sparkles!


It's a daintier look, inspired by my Candy Shoppe Amulet necklaces. I am digging the looped wire links thing. These earrings are dripping with crystals, just like a waterfall.


I've collected a bunch of Cousin brand crystals, which I love for their uniformity and versatility. Cousin Jewelry Basics crystals I would recommend to anyone, especially because they are a LOT cheaper than paying for Swarovski. They come in a rainbow of colors and sizes. You can find them at all craft stores!


I've paired those crystals (in various shapes: rondelles, rounds, bicones) with Cousin rhinestone pave beads and rose gold fishhook findings from Cousin's Elegance Metals line. The Elegance Metals collection is great because you get that fine jewelry quality without paying full price! You can get Platinum, Stainless Steel, Gold, Rose Gold and other fine metal plated pieces that add a higher-end feel to any piece. Plus, they are great for people who may be sensitive to metals.


I've used a complimentary color scheme here; pinks and teals make each other pop, and the champagne metallic thread adds that luxe touch.


You can get these Cousin materials at Primabead.com, Michaels, JoAnn, Walmart and AC Moore stores.
Let's get started!


Step 1: Gather materials. Needed are:
-Roundnose pliers and wire cutters
-Gold gauge 24 wire (mine from Cousin)
-Various size crystals. I used Cousin Jewelry Basics 8mm crystals,  smaller bacons, 6mm rounds, and rondelles. Pick crystals that suite your tastes!
-Rhinestone beads, 8mm or 6mm. Mine are from Cousin again.
-Metallic embroidery floss


Get out your collection of beads, and start picking your favorites…


Put yours into a 3-stranded arrangement that you like. You can see my arrangement in the top picture. 
Start by making links, much like in my Candy Shoppe Amulet Necklaces out of all the beads EXCEPT  the top bead in each strand. To connect the top bead, first start by linking one end of your wire in the hole on the fishhook. Add your bead, and connect the other side to the second bead in that strand, to connect the two pieces.


Your strands should be coming together. Keep working until all the beads are used and the strands are filled in.


To make the tassel, simply wind the floss around your fingers about 6 times. Carefully tie a small piece of thread at the top, and wrap with wire, cut the ends. Add a jumpring at top.


Attach this jumpring to the last loop of the middle strand. Finish by adding small crystals to the other two strands. 


Make these in any color you want! I went with a more vintage-inspired color palette and mixed metals with rose gold, champagne and regular gold.


These are a bit long if you prefer short earrings, so make as many or as little links as you want to play with the length. 


All images and instructions copyright Allison Beth Cooling. DO NOT post or use these images or text without linking back to me.