Tuesday, September 25, 2012

5-Minute Simple Drop Earrings


No, this post is not one of my usual look-alikes.
It's just a super-simple and super-quick one, using findings I had laying around.
Feel free to use whatever beads you have laying around to make a totally original design!


Plus, you can make these earrings as long as you like. Mine were about 2" or so. The chic metal chain, against the pop of color from the beads make for a cool, city vibe!
Let's get started.


Step 1: Gather materials. Needed are pliers, 4 ribbon ends, earwires, two headpins, beads (crystals, or whatever you have lying around, make sure you have two bigger ones), and box or snake chain (the kind without links).


Step 2: Cut two equal lengths of your chain. Attach ribbon ends to each end, using superglue on the inside of the ribbon ends for extra hold. Attach ear wire to each chain.


Step 3: Arrange beads on your headpin, make a loop, and insert it into the other end of your chain.
Repeat for second earring. 
How easy was that!?


I love the look of the silver snake chain; it looks very elegant and much more sophisticated than cable chain. Make these in gold as well for a different look.
These are also surprisingly light, if you use plastic beads like I did!


All photos and instructions copyright Allison Cooling for Quiet Lion Creations.
If you share/use/post this tutorial, please link back to me. It is much appreciated!

Monday, September 24, 2012

Sunday, September 16, 2012

Anthro Plucked Petals Necklace


This colorful necklace caught my eye.
The little petals reminded me of paint chips; and guess what?
I had a bunch of unused ones laying around. Instant DIY.
This is a great tutorial that uses a recycled product, the paint chips; don't throw everything away! You can make great stuff with things you'd throw in the trash!


You can make this in any color combination you want.


You can also use gold or silver wire, to customize the look!


A definite statement necklace! Sort of bird-of-a-feather meets handmade-chic. 
Make multiples in different colors to go with every outfit!


Step 1: Gather materials. Needed are paint chips, scissors, lacquer, pliers, jumprings, chain and thick wire (not sure what gauge, it doesn't totally matter either. Just make sure it's not too bendable).


Step 2: Cut your petals. Cut a template out of another paint chip. My petals measured a little less than 1" long, but you can make yours any size you want. 


Trace your template on your paint chip underside, and then cut. I used 5 different colors. I cut and used about 16 petals. 


Step 3: Take your wire, cut about 4". Loop one end with pliers, bend into a U shape, and loop the other side. Depending on how big you want your pendant, and how many petals you want, you can cut less or more of the wire. Poke holes through the top of the paint chips. Quickly coat the chips with a thin layer of gloss, for shine and protection.
 Let dry, then use jumprings to attach petals to wire holder. 
Add your chain to the ends of your wire pendant, attaching with more jumprings. 
Finished!


A wide array of cool colors!


All photos and instructions copyright Allison Cooling for Quiet Lion Creations.
If you share/use/post this tutorial, please link back to me. It is much appreciated!


Wednesday, September 12, 2012

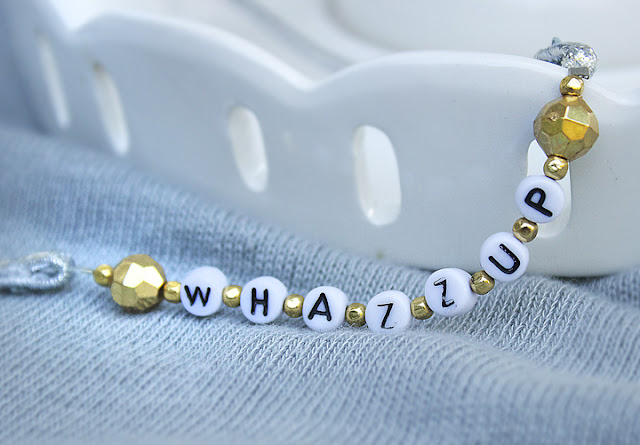
Topshop Word Bead Headband


These Topshop headbands are super-cute and super-customizable.
These are a little boring, so I used shiny beads for extra dazzle. The shine pops against your hair.
They, unlike many of my other DIYs, are not expensive, but still are worth making!
Make them say whatever you feel! Make them with your friends' names and give as gifts.
The possibilities are endless.


This tutorial uses a stretchy headband which you cut and re-sew. I used a shiny metallic one to compliment my sparkly gold beads between the letters.


Dainty yet still a little saucy!


Ready? Let's go!


Step 1: Gather ingredients. Needed are pliers, clear lacquer (not pictured), elastic cord, crimp beads, a stretchy thin headband, alphabet beads and other plastic beads (if you want), superglue (not pictured), beading thread and a needle (both not pictured).


Step 2: Cut off the metal piece on your headband. Fold over one of your ends and superglue shut (make sure there is a little opening to stick your elastic through. Let it dry. Cut about a foot of elastic and thread through the little loop, thread on a crimp, and crimp, and crimp shut. 


To secure your loop, take about a foot of beading thread, knot the end, thread on your needle, and pass through where the glue is a couple of times. Sew up and down a couple stitches, then knot and cut. Glue this knot. This gives extra security so it won't rip when you stretch it.
Of course, still be gentle when wearing.


Step 2: Thread on your beaded message. If you want a real long message, you might want to cut a couple of inches off your stretchy headband so that it's not too long and will be loose around your head.
Repeat step 2 to the other side of your headband.
Thread on the crimp, thread through the loop on the other end of your headband, and crimp shut.


Step 3: Clean up your ends of the stretchy headband. I cut off the excess fuzziness with my sharp scissors and painted with clear lacquer to seal. This makes it looked nice and polished.


Let everything dry before wearing!


All photos and instructions copyright Allison Cooling for Quiet Lion Creations.
If you share/use/post this tutorial, please link back to me. It is much appreciated!


Thursday, September 6, 2012

ROMWE M Pendant Necklaces


Mmmmmmm, M&Ms!
I think they are my most favorite candy.
When I came across these necklaces on street style site ROMWE, I totally knew I had to make one for myself. You usually hear me complain about the prices of the "Real Deals", however these real necklaces sell for only about $12- not too shabby.
However, I prefer to make things myself anyway; and I'm sure you do too. 


These are just so cute, and you can whip them up easily; make a whole collection of colors!
They actually really look like little candies; the secret is in the nail polish we put on them, paired with a coat of glossy lacquer-- double the shine.


Delicious! Total eye and neck candy!


You can also make these with silver paint and a silver chain to match, if you are not into gold.


Step 1: Gather materials. Needed are pliers/wirecutters, some clay (red if you want a red pendant), gold chain, a paintbrush, polymer clay glaze (here) , a little "m" stamp -like these if you already have a block, a gold eyepin (not headpin, sorry, metallic gold acrylic paint, and red nailpolish (or any bright nail polish, to match your clay).


Step 2: Take a marble of your clay, flatten a bit and pinch the outsides gently to flatten them. It should look like a little M&M. Cut your headpin with the pliers/wirecutters to where it measures a little shorter than the length of the pendant, and stick it in the top of your M&M. Make sure only the top of the loop sticks out.
Stamp an "M" in the middle (gently, to not flatten your pendant).


Step 3: Go and bake your pendant (I use a toaster oven at 125 degrees for about 20 minutes. For oven, do about 200 degrees). Now, take your gold paint and paintbrush; dab a little paint on the M, then quickly and gently wipe away excess with a damp cloth. I also like to use manicure sponges to gently sponge in paint, it works really well! Wipe around the M to make sure the gold is only in the stamped indent part, and not on the rest of the pendant. Let dry, then repeat again to make sure you get a nice crisp M.
When dry, paint the top of the pendant with your nail polish; this will give it a nice glossy look. Make sure to not paint in the M, just carefully around it.
Let dry, then paint the back with the nailpolish as well to finish. Let dry, then coat everything in clear gloss- super shiny!
Let dry, and add to chain with a jump ring.

Good enough to eat! 


All photos and instructions copyright Allison Cooling for Quiet Lion Creations.
If you share/use/post this tutorial, please link back to me. It is much appreciated!


Monday, September 3, 2012

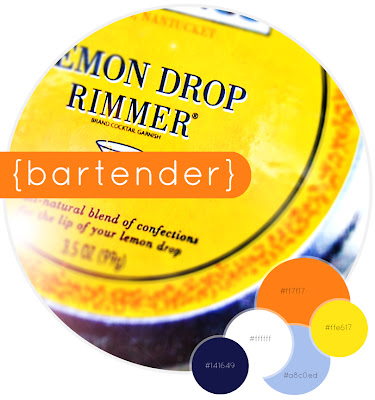
Color Monday; Bartender Palette


Another Lemon Drop, please, bartender!
This palette features complimentary yellows, oranges and blues offset by white. Clean and simple!