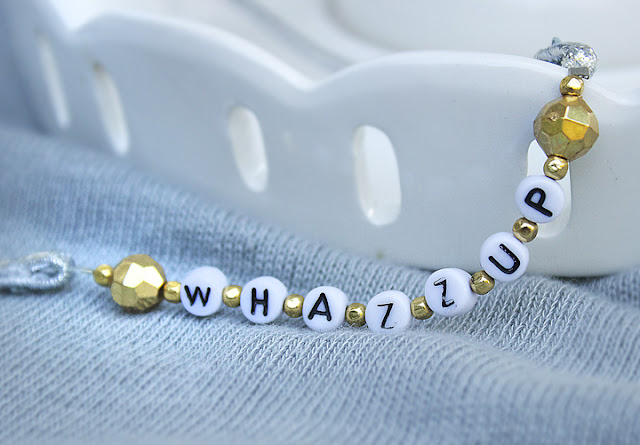
These Topshop headbands are super-cute and super-customizable.
These are a little boring, so I used shiny beads for extra dazzle. The shine pops against your hair.
They, unlike many of my other DIYs, are not expensive, but still are worth making!
Make them say whatever you feel! Make them with your friends' names and give as gifts.
The possibilities are endless.
This tutorial uses a stretchy headband which you cut and re-sew. I used a shiny metallic one to compliment my sparkly gold beads between the letters.
Dainty yet still a little saucy!
Ready? Let's go!
Step 1: Gather ingredients. Needed are pliers, clear lacquer (not pictured), elastic cord, crimp beads, a stretchy thin headband, alphabet beads and other plastic beads (if you want), superglue (not pictured), beading thread and a needle (both not pictured).
Step 2: Cut off the metal piece on your headband. Fold over one of your ends and superglue shut (make sure there is a little opening to stick your elastic through. Let it dry. Cut about a foot of elastic and thread through the little loop, thread on a crimp, and crimp, and crimp shut.
To secure your loop, take about a foot of beading thread, knot the end, thread on your needle, and pass through where the glue is a couple of times. Sew up and down a couple stitches, then knot and cut. Glue this knot. This gives extra security so it won't rip when you stretch it.
Of course, still be gentle when wearing.
Step 2: Thread on your beaded message. If you want a real long message, you might want to cut a couple of inches off your stretchy headband so that it's not too long and will be loose around your head.
Repeat step 2 to the other side of your headband.
Thread on the crimp, thread through the loop on the other end of your headband, and crimp shut.
Step 3: Clean up your ends of the stretchy headband. I cut off the excess fuzziness with my sharp scissors and painted with clear lacquer to seal. This makes it looked nice and polished.
Let everything dry before wearing!
 |
All photos and instructions copyright Allison Cooling for Quiet Lion Creations.
If you share/use/post this tutorial, please link back to me. It is much appreciated!


No comments:
Post a Comment