Thursday, August 18, 2011

Necklace Set DIY- Dainty and Designer-Style!


A trend throughout the summer has been small metallic charms on dainty chains. Celebs like Cameron Diaz and Giada De Laurentiis have been spotted displaying this trend, and it's actually really easy to replicate for an everyday crafter (like us!). 

Giada and Cameron rock the style
I took a gander at Emily Elizabeth's website, a jewelry designer endorsed by celebs like Lauren Conrad, and found a great set of charm necklaces easy enough to make at home! I chose to show how to make the diamond necklace; it's really the easiest shape, and you can apply the technique later to make all the others! I use polymer clay and my own faux-metallic method to give the impression of real gold!
The full tutorial awaits below!

Emily Elizabeth Cards Necklace Set- 14K Gold
My version. Pretty similar, no?!


Step 1: gather materials. For making the diamond charm, you will need a pasta machine (for rolling clay. If you don't have one, you can use a smooth marker as a rolling pin), a paintbrush, a tissue blade (use scissors or a sharp knife if you don't have one), a dainty gold chain, a gold headpin, roundnose pliers, a swatch of knobby-textured wallpaper, marble-sized piece of gold colored clay and gold eyeshadow. For the later steps, you will need gold shimmery nail polish and a golden jump ring.


Step 2: create a loop on your gold headpin. Just take the roundnose pliers, create a loop at one end. Take the wire just at the place the wire loops back and touches, and bend the straight part back to make a lollipop shape. Next, roll the gold clay through the largest setting on your pasta machine (or roll with marker to about 2cm. thick). Take a pencil and draw a very small diamond onto the clay a little less than .5" tall. The key here is to think small! Emily Elizabeth's charms are 1/4". That was a little too small for me to make a nice-looking charm, so I made it a little bigger.


Step 3: cut out the diamond shape with your tissue blade. Make sure it is as perfectly-shaped as possible. If it's not perfect, try again. It won't look professional and designer-quality! Now, take your swatch of wallpaper (look at the texture on mine, this is what you want). Gently press on your clay diamond, making sure not to distort the shape. If this happens, you can carefully trim all edges again to obtain a crisp diamond shape.


Step 4: carefully brush the top of your diamond with the gold eyeshadow. Make sure you get it all into the textured parts, making sure you get a good shine all around. You can press down a little hard to make sure the shadow adheres. Now, bake the piece (I used a toaster oven set at 150 degrees for 15 minutes). If you are using a regular oven, I usually do about 215 degrees at 20 minutes. Let it cool completely. (Get out some gold nail polish, you will need it next!) When that's cool, superglue your loop to the back of the charm as above. Make sure none of the straight part pokes out above the tip.


Step 5: For finishing the charm, get out a bottle of sheer gold nail polish (nothing too thick or severely colored. We want subtle shine here). Carefully brush one coat all over the top and sides of the charm, making sure it is not super thick and doesn't cover up all of that good shimmery eyeshadow. Use your loop as a holding place to not smudge the charm with your fingers. Let that dry overnight, just to make sure everything is super-dry. The worst is still having that wet nail polish smell and tackiness!
Attach a gold jump ring to your loop. Attach the ring to your gold chain. Wear your new creation proudly, and let everyone think you spend $70 on it!!
To make all the other shapes, just cut your clay (in steps 1 and 2) to the spade, clover, and heart icons. Using an X-acto knife or even a sharp paring knife will help here.

My designer diamond necklace!
My diamond and heart-shaped necklaces.


If you share/use/post this tutorial, please link back to me. It is much appreciated!


Tuesday, August 16, 2011

DIY Baby Bunting- Cute Recycled fashion


The ombré effect is in now. It's the French word for gradual change in color, whether light to dark or throughout different hues. A tye-dye tee would accommodate this trend perfectly. But instead of just wearing the shirt, I wanted to create something out of it. Inspired by late summer parties and the garlands of mexican fiestas, I created a miniature bunting-esque garland, and finished it off with vintage buttons to make a super-soft, super-colorful, and super-fun necklace!


    Above is my rainbow tye-dye bunting necklace. For this tutorial, I also used a tye-dye shirt, but one with variegated blues. Feel free to use any old tee you have, and even mix tees and colors if you want. A fully customizable accessory!
    Let's get on with the directions!


    Step 1: Gather materials. An old tee, scissors, glue, a ruler, cotton thread, two crimps, a vintage button (can be with shank or without), a toothpick, and of course pliers.


    Step 2: Cut off the sleeves of your shirt (that's all you'll need!). Then, cut the seam so you have two flat pieces of fabric.


    Step 3: Time to make the triangles. Fold the piece of fabric, with the folded side towards you. Cut out an equilateral triangle, about 1.5 cm. long (you can alter this size, though, depending on how big you want your "charms"). To make sure your triangles are all the same size, lay the cut triangle on top, and use it like a stencil. Cut another triangle, following the first one. Make sure the bottom of the triangle is always along the fold, so if you open up the little fabric triangle you will have a diamond.


    Step 4: Here are all my triangles. I used 18 all together, to make a necklace about 18" long. Cut more or less depending on the size of your triangles and the size you want your necklace. As you can see, I have diamond cut-outs all along my fabric. I was trying to get a nice balance of colors, light and dark, and subtle patterns. I wanted to get the best parts of the fabric in the little triangles! If you are using solid fabric, you don't have to worry about that! 


     Step 5: Attach the fabric to the thread. About 1" to 2" from the end of your thread, that's where you want to start. Take your toothpick, put a line of glue along the middle of a flattened fabric triangle (now diamond). Take another small smear of glue with your toothpick, and smear the glue at the bottom of the diamond, making sure you get some glue on the tip. Lay the thread across the middle, through the line of glue. Press down, fold the top flap over and onto the bottom, pressing down and rubbing gently to attach and have the glue stick. 


    Step 6: Continue this process, spacing the triangles about 1.5 cm. apart. Keep adding until you get about 2" from the other end of the thread. If you are using tye-dye fabric, make sure you space out lights and darks evenly for a good variation in color.


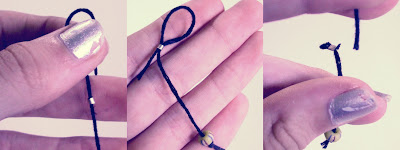
    Step 7: Finishing. Add a crimp to one end of the thread. Loop the thread around and back through the crimp, leaving enough of a loop for your button to snugly pass through. Crimp shut and cut. For the other side, add a crimp, then the button, and loop back through the crimp. Pull snug up until the fabric triangle. Crimp shut and cut. If you are using a regular button with holes, just add the thread through one hole and loop it back through the other, then the crimp.

    The finished product! See how nice of a closure the button makes? I chose a similar hued button for color similarity, but you could choose any color you like (or just use what you have!) Another cool effect is to use the complimentary color of your triangles. Blue and orange, yellow and purple, red and green. It will give a cool pop of color. Try it out!


    My rainbow bunting necklace. My mom stole my blue one above before I could take a picture. I guess she liked it a lot! 
    This project is an awesome way to recycle something that would have been thrown away. Save the rest of your tee to make something else, or more baby bunting necklaces!


    If you share/use/post this tutorial, please link back to me. It is much appreciated!

    Wednesday, August 10, 2011

    Feather Frenzy; a hip tutorial!

    This summer is all about feathers; earrings, necklaces and accessories galore are gilded with these natural trinkets. Celebrities flaunt these airy charms with such ease. This got me to thinking.... being crafty, I'm sure I could make some of my own designer-worthy adornments!
    celebrities are feather fanatics!

    I also didn't want to just buy a bunch of feathers from a craft store or off the internet. Not only is this not nature (or animal) friendly, it's just so un-original. So, I went on a hunt. If I was going to use an animal product, I was going to make sure it was done with consideration and compassion for the animal; no feather-plucking. It turns out I found two feathers in the grass of my front yard; and they were both perfect sizes for earring-making. 


    Enough talking. Here is the 7-step tutorial for my version of celeb-worthy earrings, shown above. :) The trick to these earrings is to only wear them one ear. 


    Step 1: Gather materials. You will need some black embroidery floss, a small feather (preferably a found object), one silver earring fishhook, one silver ribbon end, three African tribal beads, two silver crimp beads, and about 3" of small, 2mm chain (differing sizes are ok).


    Step 2: Add the ribbon end to the tip of the feather. Fold one side in, snug against the feather tip. Then, bend the other side over, on top of the first side. Squeeze really tight to secure.


    Step 3: Add a length of chain to the feather. You can make it as long as you want. I used about 2" of chain.  Then, get your embroidery floss. Thread one bead onto the end of about a 9" piece. Knot the thread (simple overhand) twice near one end, to make sure the bead stays. Then, measure how long you want the longest bead dangle to be. Just eyeball it. Pinch the floss. It should be about as long as the feather.


    Step 4: Measure how long your dangle is. Remember that (mine was 3") and add a crimp to the floss. Loop the end that you threaded it through, and thread it through again. Make sure you leave a tiny loop on the outside of the crimp, and crimp shut. The dangle should still be your measured inch long, with a free piece of thread on the other side. 

    Step 5: Add your other bead to the free end. Knot the thread twice, making this dangle a little shorter than your previous dangle. Cut near the knot to finish. You will have a double dangle!

    Step 6: For the last dangle, cut about a 4" piece of thread. This should be the shortest dangle (think about 1"). Add your last bead to one end, and knot twice near the end. Add the last crimp to the other end, and loop as you did before, leaving a small loop out of the crimp. Crimp shut and cut. 


    Step 7: Finishing. First, add your smallest dangle. Next, add the chained feather. Lastly, add your long double dangle. Finished! 

    the finished earring. chic, yet natural. super-cool.
    a second earring i made with another feather.


    There 'ya go! If you share/use/post this tutorial, please link back to me. It is much appreciated :)