Twinkle Twinkle little stars......
Announcing my second official Cousin Corporation 'Tis The Season project! (You can view my first, Swirl Mint Bobby Pins, here)... We were asked to create both a jewelry and non-jewelry item, this post obviously being the latter of the two.
This intricate dreamcatcher is what I imagined as a more modern holiday decoration; I have a love for dreamcatchers, and basically anything with feathers (see my feather earring posts here, here and here!), so I took inspiration in a traditional dreamcatcher to make my Twinkle Star version....
I love holiday decorations that focus on mixing metals or incorporating shiny stuff! Silver bells, metallic garlands, super-shiny ornaments and the like are more my style when decorating for the holidays; the shinier, the glitzier, the better! That's why I sought to create this dreamcatcher, mixing both crystal elements, metal charms, dainty chain and everything in-between to create a super original, super gorgeous decoration! We will start by making a bead frame out of wire, then wrapping it. After that, it's about adding chain and charms.
This dreamcatcher also isn't holiday-specific. You could leave it up for the whole winter if you want! If you wanted to be really ambitious, you could make some of these for your friends or family for the holidays. I always say handmade items have far more value than something you bought in a store.
All the materials used here were from Cousin Corporation, most being part of their new 'Tis the Season line, which can be found at AC Moore stores and Beverly's fabrics (for California readers!). This 'Tis the Season line features all different cute charms, beads and findings that are super cute and great for making all sorts of jewelry or crafts! The whole collection can be seen here, or buy them at Prima bead online!
To follow Beverly's on Facebook, click here!
To follow AC Moore on Facebook, click here!
To follow Cousin on Facebook, click here!
Both have great jewelry ideas, tutorials, promotions, sales and other cool things for craft DIY-ers!
Without further ado, let's get started! * This tutorial is NOT for very beginners! It's more complicated than most of my tutorials, but you CAN do it!!!! *
**ANY QUESTIONS ABOUT THIS TUTORIAL, LEAVE IN THE COMMENTS BELOW! I WILL ANSWER YOU!!**

Step 1: Gather materials. Needed are pliers, a small star cookie cutter (about 2" wide or so), 24G Gold Cousin Brand Wire, Jingle Bell Charms (mine from Cousin Corporation), Snowflake Charms (mine from Cousin), and 8mm Round Faceted Beads (mine from Cousin Corporation) and jumprings.
You will also need thin white chain, about 1.7mm or 2mm, 4mm clear crystals, and 10mm white pearls.

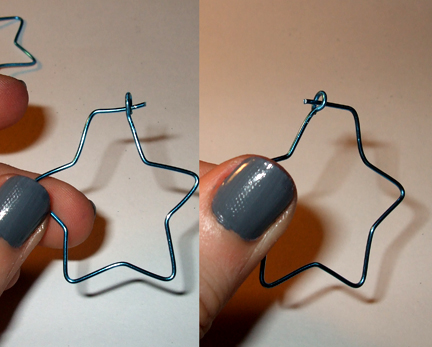
Step 2: Cut about a foot of your gold wire. Twist it like in my UO Heart Necklace (below) but DO NOT fold in half into a "V". Instead, form around your cookie cutter, and with the excess wire create a top wrapped loop. Cut flush. Make 8 stars.


Step 3: With your gold wire, wrap about 10 times around a biscuit cutter or glass to create a large frame for your dreamcatcher. Where both ends meet, take a 3" piece of wire and wrap around these ends to secure, then cut the wire flush.

Step 4: You should have a large frame (first picture). With about 2' of wire, an inch from the end wrap about 5 times right up against your wrap in Step 3. Add on your 8mm Faceted Bead, and wrap your wire about 3 times after this bead, pulling nice and tight. Your first bead wrap should look like mine above.

Step 5: Continue wrapping, until you have finished the whole frame. Your amount of beads and amount of wire will vary depending on what size you want your dreamcatcher. Mine is about 4.5" in diameter. Cut the wire flush when you finish wrapping.

Step 6: Cut varying lengths of your white chain, and attach each piece to one of your 7 stars; One 8", two 5.5", two 4.5" two 2.5" pieces. Then, cut one 7" piece, two 5" pieces and two 3.5" pieces and attach to one each of your star charms.

Attach them in this pattern; 8" star in the middle, followed by the 7" piece. Like a mirror, add the 5" snowflake piece on either side of the middle, then the 5.5" stars, then the 4.5" stars, then the 3.5" snowflakes, then finally the 2.5" stars. Attach all these with your jumprings to the wire loops you made when wire wrapping (in between each bead, not connecting them to the thick frame itself. It should look like this above.

Step 7: Add your jingle bell charms, I used only the silver and gold ones to keep with the theme. Add these in a nice pattern you like, varying the lengths but mirroring each side. I added a silver bell to the bottom of each star. You can look at mine and use it as a pattern. Attach each with a jumpring.

Step 8: To finish the center of the dreamcatcher, twist about 4" of your wire (like in Step 2) but keep straight, and create unclosed loops at each end. Form this into a slight "U" shape, and attach to the side of your dreamcatcher, making sure the loops go in between beads. Then, close the loops to secure the wire.

Step 9: Repeat Step 8, and add this piece to the other side (shown in first picture). Make one more piece, but only using 3" of wire, thread on your last star charm, and attach to the top as shown. Add your snowflake charm to the middle of this star charm with a jump ring. Lastly, cut about 6" of wire, and bead on alternating white pearls and 4mm clear crystals (I used 5 pearls and 4 crystals). Wrap this around your leftmost twisted wire decoration (second picture), then wrap around your other side to finish (last picture). You are finished!
You may need to alter some of the measurements or bead amounts, depending on how big you decide to make your dreamcatcher. Use pattern to your own discretion!

This is a different take on a traditional dreamcatcher, which makes for a very unique and interesting look. This is also great for people who are not into feathers, or who craft vegan (no leather, shells or animal products).

You can make this in any color scheme, and with any kind of small cookie cutter to get different shapes! To hang, simply hang from the top or you can tie a small ribbon at the top and use it that way. Whatever way you choose, this is very dainty and makes a chime-like sound from the jingle bells in the wind! My favorite spot to put it is hanging in front of my window; when the light hits it, it sends sparkles flying everywhere around the room. A sure centerpiece for any holiday party, people will want to know where you bought it; imagine their surprise when you tell 'em you made it! They just might want one of their own....

If you share/use/post this tutorial, you must link back to me please. All photos
copyright Allison Beth Cooling. Do not use photos without crediting me!