Showing posts with label embroidery. Show all posts

Saturday, April 25, 2015

vintage lace headband diy

vintage lace headband diy by quiet lion creations

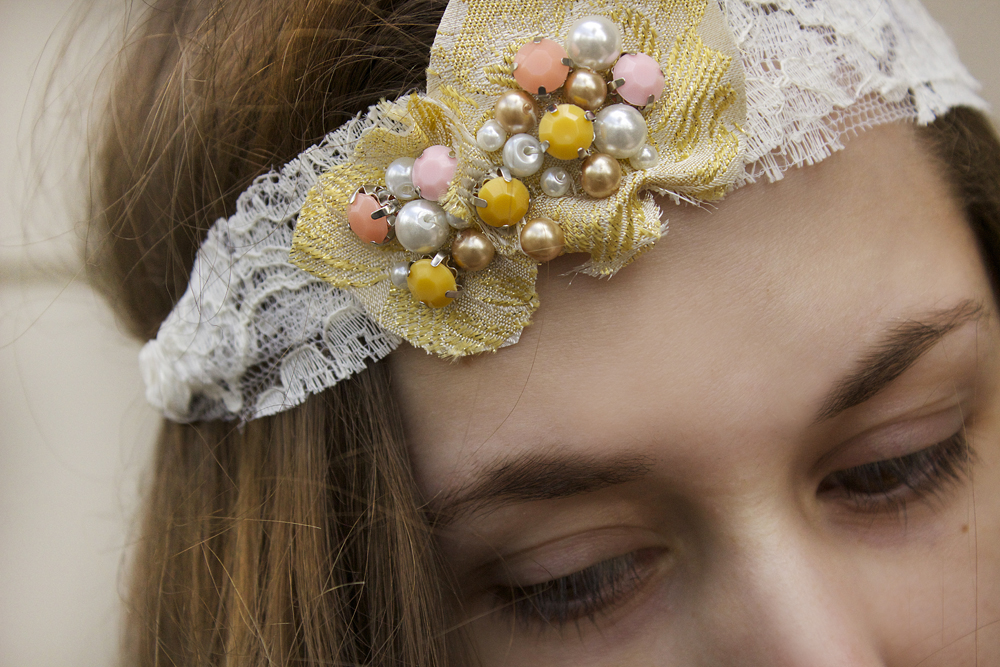
A mix of lace, gilded fabric, pearls, rhinestones and ribbon make for a very vintage-looking accessory! As you may know, I am not a huge fan of sewing. Reason 1: I'm not real good at it. Reason 2: My sewing machine sucks. There may be a correlation there.
vintage lace headband diy by quiet lion creations

Anyways, this tutorial isn't as much sewing as it is embroidery. Simple embroidery. I can deal with that. Plus, most of the materials I used were recycled: lace remnants and vintage fabric, plus vintage satin ribbon as well.

vintage lace headband diy by quiet lion creations

Now, if you know me, I DO NOT like pink, or girly-type things. This one's for you guys. I know all my followers aren't into a hippie/boho vibe, so I've made something completely different here. A feminine hair accessory with plenty of girly glitz. It's called taking one for the team. You can thank me later.

vintage lace headband diy by quiet lion creations vintage lace headband diy by quiet lion creations

I do really like rhinestones, and these bright montees from Pandahall really added a more antique look, because they aren't super sparkly - they have that soft milky look which mimics rhinestones found in older jewelry. Pair that with some taupe and ivory pearls and you've got yourself a totally versatile headband. And, if you haven't already, check out the website Pandahall if you're an avid beader - seriously, I think they have everything that you could ever need.

Enough talking, let's start!


Step 1: Gather materials. Needed are 6mm pearls (mine from Pandahall), 8mm sew-on montee rhinestones (mine from Pandahall), lace scraps, ribbon, brocade fabric, sewing thread and needle.

I used a vintage brocade fabric with foiled flowers, that matched my more neutral-color rhinestones. Also, the flowers provided good sewing spots. If you use more of an abstract patterned fabric, find the coolest (or most interesting) parts to embroider on.


Step 2: Cut a small piece of your vintage fabric. Start sewing on the montees and pearls - I used the middle of the flower as my focal point. I also used a double thickness of sewing thread for sturdiness.


Step 3: Once you feel you have embellished enough (don't go overboard here), cut out your appliqué from the the rest of the fabric. I made two flower appliqués. You could use any number of appliqués, depending on the look you are going for.


Step 4: Cut out two pieces of lace - make sure these are long enough to go around half of your head (the other half of the headband will be ribbon). I cut them about 1.5" wide. I'm doubling up the lace for a sturdier headband. Stack these lace pieces right on top of each other.


Step 5: Start sewing on your appliqués to the lace. Again, use double-strength sewing thread so it holds better. I'd suggest sewing the appliqués a little off-center. Sew these on really good, passing up and down many times until you can feel they are super secure. Tie off thread and cut.


Step 6: Take a length of ribbon that is the entire circumference of your head, and double it. Cut. Repeat. Fold one of these pieces in half, sewing on the end of the lace around this fold. Sew really good to make sure the hold is secure! Cut ribbon off and repeat on other side to finish your headband.

vintage lace headband diy by quiet lion creations

To wear, simply tie ribbon in bow at back of head.
  vintage lace headband diy by quiet lion creations

Again, like most of my tutorials, this is totally customizable. Use any combination of colors and fabrics to reflect your style. You could also ditch the pearls and use Swarovski crystals or something super sparkly for a more luxe look.
vintage lace headband diy by quiet lion creations

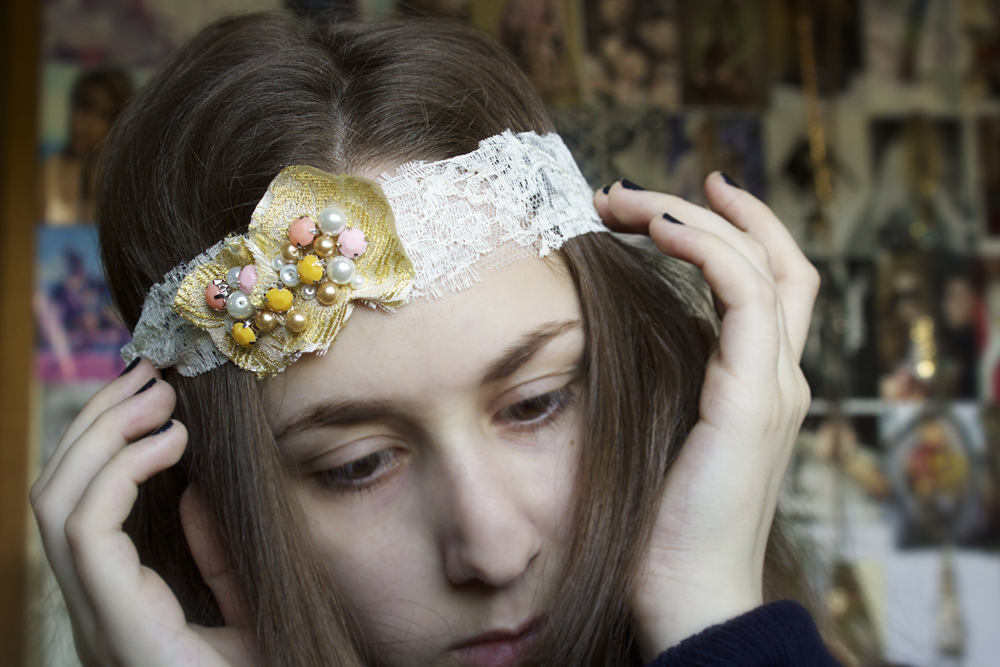
Ignore my pale skin here (I actually might be part vampire?!) - you can see that this headband lies really nicely, because of the flexibility of the lace. Earlier I added it to an updo, but you can also go with long waves or even straight hair, using this as more of a head wrap as apposed to a headband.

vintage lace headband diy by quiet lion creations

So, if you're like me and hate sewing, I advise you to try this tutorial- trust me, you will be fine. This would look super-chic styled with an oversized white tee, dark denim skinny jeans and flats. Casual, but still super stylish. Agree?!

All images copyright Allison Beth Cooling for Quiet Lion Creations. Don't repost these photos without linking back to me and crediting me!

Friday, December 19, 2014

Hippie Crystal Headwrap


Now, this is my kind of tutorial!


Recycled materials + Swarovski crystals + gemstone beads + tie dye = pure hippie glam.


This tutorial combines all types of beads, aka "bead soup" as us crafters call it, to create a bohemian-chic accessory that makes a statement.


It can easily be customized for all your tastes! I used tie dye fabric from a recycled skirt, but if Super Hippie isn't your preferred look, feel free to use plain black fabric or anything else your heart desires. 


This is a turban-style head wrap which is sewn shut, without elastic. You've gotta be good about measuring for this one! You'll use denim (I used it from old worn jeans to recycle) to create a stiff front panel to embroider on.


I created a starburst pattern, stemming from a focal arrangement of hexagonal vitrail (that multihued-coating which looks like a shining rainbow) chandelier-style crystals. Stemming from this is more crystal rondelles, crystal flat backs by Swarovski Create Your Style, pillow Swarovski sew-on vitrail beads, and turquoise gemstone ovals. Turquoise is a purification stone, and is associated with the third eye chakra, so how fitting to use it in a headband?! You can read more about the powers of Turquoise here! Also, vitrail is a french word associated with stained glass, so it's very fitting for describing these crystals.


I kept with a palette of purples/greens/blues here to keep it somewhat consistent! I have a few more color palette ideas too:
-Black shiny fabric with gold, silver and champagne beads for a totally flashy look
-White fabric (with lace!) and pearls, light pink beads and white crystals for a girly look
-Maybe even try brown (faux) leather with copper, turquoise and bronze beads for a "country" feel...


That rhinestone chain is easy to sew on; simply weave and catch the metal in-between the links in your weave! It gives a cool "caged" look to the beads. Lovin' those Swarovski pillow beads too. 


Super glam, right?! Oh, if you want this sign (umm why wouldn't you?!) head to my Prada Marfa Wall Art Tutorial here! Trust me, quick and easy!
Are we finally ready for the tutorial?!!


Step 1: Gather materials. Needed are:

-Fabric. My tie dye is from an old hippie skirt that I cut up.
-Denim. I used recycled old blue jeans, thicker denim.
-Crystals, beads, you name it. Get all your sparkles together to use here. There are no right or wrong beads! I used an assortment of 3mm / 4mm crystals, Swarovski sew on crystals, turquoise oval beads from Happy Mango Beads, hexagon vitrail crystals (found them randomly on Ebay)
-Rhinestone Chain. Mine from Cousin Corporation
-Flatback Crystals. Mine are Swarovski Create Your Style, which you can buy at Michael's or JoAnn Fabrics. I also used Cousin brand Crystazzi flat backs (the small blue ones)
-Thread. I used the extra strong kind, used to sew leather together.
-Glue


I first measured how wide I wanted the headband, and I cut a shape out of the denim and tapered it; You don't have to make it long enough to go around your head, because this is simply the "backing" to your embroidery to keep it stiff. I made mine long enough to sit above the ears. 
Your actual piece of fabric will need to be longer. This is the piece that has to go all the way around your head. So cut a roundabout shape to frame the denim piece with about 1/2" on each side of the denim. I'm lazy so I hot glued my denim piece to the tie dye fabric, folding the fabric over the back of the denim and gluing down. Yes, lazy. Don't cut any fabric yet. Now, flip this over and you should have a nice clean surface.


I started embroidering beads, starting with my focal point of those hexagon vitrail crystals. I layered those with other hexagon crystals and gold rondelles. I laid out my beads before I actually sewed them on, to see how I wanted my composition to go. Do the same! That way, it will save you aggravation if you end up not liking what you just sewed in! I sort of did a sunburst pattern going outwards. I used the rhinestone chain to "cage" certain beads. When I was done sewing, I simply glued on more glitz with the rhinestones and Swarovski flat backs, using E6000 glue.


The top image shows my final pattern. Wait for all your glue to dry before continuing with the next step! When it's all dry, simply fold in and sew in the raw edges on both sides. Take a small piece of fabric and use it to join  the ends, and sew shut. MAKE SURE YOU MEASURE before cutting your final piece! Make your headband snug but not super super tight.


Love the colors in these crystals!


This would look sick on beach vacations; the bright colors and someplace tropical go hand in hand!


Even wear this with an oversized sweater, leggings and ankle booties for a new-bohemian look.


Wear it with your hair up, or down. Or with a braid!


Thanks for reading!

All photos and text copyright Allison Beth Cooling. DO NOT POST OR REUSE WITHOUT LINKING TO ME AND CREDITING ME.